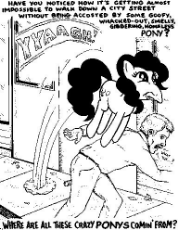
Tuesday October 23rd at 6pm PST mlpol will be raiding 4chan /LGBT/ we ONLY post hetero and Nazi materials. We will take the battle directly to the faggots.
/mlpol/ - My Little Politics
Archived thread
Fricking radical
you have my sword /)
you have my sword /)

>>180294
I think you're being naive, but okay no ponies.
Reminder, 4chan has the most extensive captchca and anti-raiding system of all the chans. VPNs are a must, and anons without them should consider kamikaze thread creation. Posts will be limited to 1/minute, and mods can be expected to be on hand and willing to cross-board assist cuz lulz.
>>180281
So who's the faggot calling for this raid? How do we know this isn't a plan to get us all banned?
So who's the faggot calling for this raid? How do we know this isn't a plan to get us all banned?
>>180301
Banned from where, 4/lgbt/? How gay are you
You forget that mods=gods here and 9/11 times they're the ones organising raids
Banned from where, 4/lgbt/? How gay are you
You forget that mods=gods here and 9/11 times they're the ones organising raids
Looks like I'll have another opportunity to flesh my hidden image guide out, maybe throw some Windows instructions into the mix. Man, I love raids.
1540157656.jpg (178.3 KB, 600x600, swfupload_3750614948418264236.jpg)

>>180310
>I'll have another opportunity to flesh my hidden image guide out
Damn! I forgot to save your guide.
I'll do it right away, plus I will begin to practice it.
Superb guide; thanks.
>I'll have another opportunity to flesh my hidden image guide out
Damn! I forgot to save your guide.
I'll do it right away, plus I will begin to practice it.
Superb guide; thanks.
>>180312
It's a command-line process involving a Ruby script and ImageMagick, though I'd prefer to re-amend it with some extra information I'd discovered along with some Windows instructions before giving it a proper formatted post here. If you're feeling adventurous, you can find the details here: http://thume.ca/projects/2012/11/14/magic-png-files/
Should you want my previous, less complete guide, I'll throw it on as a TXT file. There's also supposed to be a web generator for these files, but I don't trust web generators. Find and use any such generators at your own risk.
>>180318
Muchas gracias, señor. Old guide's attached, though I'm really not sure why the thread it was posted in was nuked.
>>180334
>though I'm really not sure why the thread it was posted in was nuked.
Yeap, I couldn't find it. Probably because is the "smoking gun" of our activities.
>though I'm really not sure why the thread it was posted in was nuked.
Yeap, I couldn't find it. Probably because is the "smoking gun" of our activities.
>>180291
YES ponies, ofc ponies when I said hetro I meant it as in NO gay pony posting only Hetro Pony posting. Figured it was implied that we would be posting ponies since we are /mlpol/. WE WILL DROWN THEM IN HORSE PUSSY!
YES ponies, ofc ponies when I said hetro I meant it as in NO gay pony posting only Hetro Pony posting. Figured it was implied that we would be posting ponies since we are /mlpol/. WE WILL DROWN THEM IN HORSE PUSSY!
>>180365
it's also not Tuesday. I put the thread up a few days early so we have time to organize and prepare for battle. /lgbt/ is a big board bigger than 8trap and 8adbt was this is our biggest opponent yet so I wanted to make sure as many of us are on board as possible to ensure the highest percent chance of success in this raid.
it's also not Tuesday. I put the thread up a few days early so we have time to organize and prepare for battle. /lgbt/ is a big board bigger than 8trap and 8adbt was this is our biggest opponent yet so I wanted to make sure as many of us are on board as possible to ensure the highest percent chance of success in this raid.
All right faggots, it's guide time. Turns out that Windows wasn't very hard to get working, and I got to rediscover Chocolatey's magic while I was at it, so hallelujah for that. Easy to forget how spoiled the Loonix crowd is with package managers.
Prerequisites:
- Ruby
⌙ doubleVision (https://github.com/trishume/doubleVision)
- ImageMagick
Step 0: Installing the prerequisites
For Linux: Install ImageMagick and Ruby from your distro's usual sources, then run # gem install doubleVision to install doubleVision.
For macOS: Get a package manager such as Macports, Brew, or whatever kludge they use this week, and follow the instructions for Linux. All Linux commands should work exactly the same for macOS.
For Windows (the easy way): Install Chocolatey from (https://chocolatey.org/install). Once installed, open a command prompt as an administrator and run > choco install ruby, and > choco install imagemagick.app -PackageParameters LegacySupport=true. Close the admin command prompt, open a normal non-admin prompt, then run > gem install doubleVision to install doubleVision.
For Windows (the hard way): Install Ruby for Windows from (https://rubyinstaller.org/downloads/). Pick the latest Ruby+Devkit installer, and install the defaults. During the MSYS setup phase, accept the defaults. This step will take around 1 GB of space!
Install ImageMagick for Windows from (https://www.imagemagick.org/script/download.php#windows). Pick the latest recommended installer. During installation, check the box to install legacy utilities!
After everything is installed, open a command prompt and run > gem install doubleVision to install doubleVision.
All Linux/macOS commands will be shown like this, and all Windows commands will be shown like this. Mods, I know NPFchan supports code tags, yet they aren't enabled. Explain yourselves.
Step 1: Preparing the images
We will need two images: one our fake thumbnail, the 'mask', and the other our real image, the 'secret'. File type won't matter, since we're converting them to PNG files.
Ensure the images are of a similar aspect ratio. We will be resizing these images, so this is important to not distort the end result, particularly our 'secret'.
Copy both your images to a working directory, and open a command prompt there.
Our first step is to resize our 'secret' to a maximum of 600 pixels in either dimension, removing all transparency and replacing it with white.
$ convert <input secret image> -resize 600x600 -background white -flatten secret.png
> convert <input secret image> -resize 600x600 -background white -flatten secret.png
Make a note of the dimensions of the output image. In my example, it is 600x338. Our 'mask' image will need to be perfectly resized to this resolution.
$ convert <input mask image> -resize 600x338\\! -background white -flatten mask.png
> convert <input mask image> -resize 600x338! -background white -flatten mask.png
Do not omit the \\! or ! in the resize argument. It is needed to resize the mask image perfectly.
You should have two identically sized PNG images.
Adjust parameters to taste.
You can increase the resolution of the images if you wish, but the process of creating our trick image doubles the resolution of our input images, so this will have a negative effect on both filesize and viewability on common resolutions. Don't exceed more than 1000 pixels in any dimension, as an absolute maximum.
Step 2: Creating the trick image
Merge our two images with the doubleVision command.
$ doubleVision secret.png mask.png result.png
> doublevision secret.png mask.png result.png
This should create our trick image. If it fails, ensure that both the secret and mask images are PNG's, have identical resolutions, and try again.
Opening this image in common image viewers and even ImageMagick itself will show our mask image, but opening it in a web browser will show the secret image instead. You'll no doubt notice the thumbnail is also the mask image, too.
Repeat these steps for every image you want to conceal.
This trick works because of 4th-dimensional Warp fuckery with PNG gamma settings. If you'd like to learn more, you can read further at http://thume.ca/projects/2012/11/14/magic-png-files/
A warning regarding mobilefags: these trick images will not work on mobile apps like Clover and Dashchan! They use the internal Android image renderer, which will show only the mask image like any other common image viewer. Mobilefags must use a web browser to see the images for what they are.
All example images and Windows commands were tested on Windows 7. There's no reason they shouldn't work for newer versions.
And thus ends another good night's research and testing! Now that our Windows users aren't left in the dust and hopefully if I didn't fuck up my formatting again, let's see some good trick images this thread! You faggots disappointed me last thread, so let's not have a repeat performance.
>>180390
>You faggots disappointed me last thread, so let's not have a repeat performance.
Guide saved.
About the disappointment, be patient, installing non .DEB software in Linux is not easy for me and takes time and some mental gymnastic.
I'll be back with news later.
>You faggots disappointed me last thread, so let's not have a repeat performance.
Guide saved.
About the disappointment, be patient, installing non .DEB software in Linux is not easy for me and takes time and some mental gymnastic.
I'll be back with news later.
>>180396
>installing non .DEB software in Linux
Should be a quick # apt-get install ruby imagemagick, assuming you're running Ubuntu, Mint or Debian.
>installing non .DEB software in Linux
Should be a quick # apt-get install ruby imagemagick, assuming you're running Ubuntu, Mint or Debian.
>>180369
I want to join but 4Chins won't let me post with a VPN without (((Gold Membership))), and I doubt the CPC would respect my decision to post on the site.
I want to join but 4Chins won't let me post with a VPN without (((Gold Membership))), and I doubt the CPC would respect my decision to post on the site.
>>180281
If I have the time, I'm willing to go for another round. I might not though, so I'll offer up moral support anyway. Kick their asses!
If I have the time, I'm willing to go for another round. I might not though, so I'll offer up moral support anyway. Kick their asses!
>>180281
why tho, don't imagine you'd like it if fags flooded in here and I'm pretty sure this violates the NAP
why tho, don't imagine you'd like it if fags flooded in here and I'm pretty sure this violates the NAP
>>180705
i mean if fags tried to counter-raid we'd just spam them with hetero nazi hors porn until they fuck off
i mean if fags tried to counter-raid we'd just spam them with hetero nazi hors porn until they fuck off
>>180390
Everything is installed, just looking for the fucking directory for an hour. Hopefully will have stuff soon.
Everything is installed, just looking for the fucking directory for an hour. Hopefully will have stuff soon.
>>180718
Tab completion will save you a lot of time and keystrokes. https://en.wikipedia.org/wiki/Command-line_completion#Prompting_completion
Tab completion will save you a lot of time and keystrokes. https://en.wikipedia.org/wiki/Command-line_completion#Prompting_completion
>>180717
Recon:
Having posted a single Shalit thread (3.5 hours ago), I have a few things to report.
1. The posting rate of said board is insufficient to wipe a thread in 3.5 hours; said thread is still in the catalog
2. I am not banned for it
3. I think we can own these fagst
A. Additionally, their Thread-posting timer is >10min, so OPs should VPN, but bumps and thread-assists can be without VPN.
B. They're gonna aim for the 'obvious' targets first, so non-pony will possibly be less immediately acted on than pony, and is advised for non-VPN users
C. If done right, I think we can wipe their catalog (its pretty short for a 4chan board) and claim their entire board for the Denver Broncos
4. For those wondering about the righteousness of wrecking their shit, remember that 4chan determined that mlpol was NOT acceptable, but that their degeneracy LONG BEFORE AND SINCE is. This isn't about what they have done to us, its what they (4chan - admins, mods, etc - have done and have NOT done, to and for us).
Plus they're exceptional (and literal) faggots.
>>180731
And I just got my image collection to sync to my phone, too.
On the plus side, I attracted the wrath of Barneyfag before the thread was nuked.
And I just got my image collection to sync to my phone, too.
On the plus side, I attracted the wrath of Barneyfag before the thread was nuked.
>>180734
Me too.. Looks like the LGBT community isn't inclusive to people who identify as Pony. In Canada that would be a hate crime (probably).
Me too.. Looks like the LGBT community isn't inclusive to people who identify as Pony. In Canada that would be a hate crime (probably).
>>180732
Keep banging away at it, I believe in you!
>>180736
You need at least 3 Jewish SIG's to back your identity of choice before it's considered a hate crime to discriminate against it, don'tcha know eh?
Anyways, Pacific and Atlantic time differences are a real bitch, so I'll have to clock out here. Here's to the next raid, fagaloons! Next time, I'll see about hiding trick images in GIF thumbnails. This specimen went undeleted on an old /mlp/ thread, looking forward to cracking it's secrets!
>>180738
Looks like the GIF has an one frame (probably 1st frame) with image of Twilight in innocent pose.
Looks like the GIF has an one frame (probably 1st frame) with image of Twilight in innocent pose.
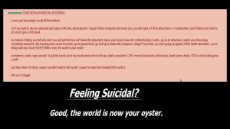
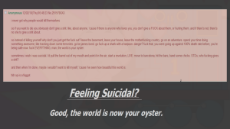
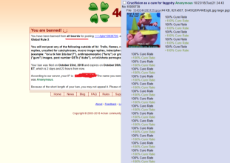
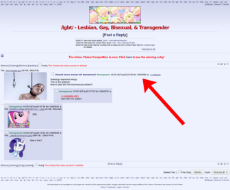
1540352180_1.png (278.0 KB, 1346x1114, Firefox_Screenshot_2018-10-24T03-32-03.940Z.png)
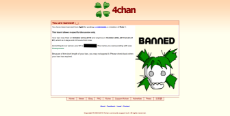
1540352180_2.png (110.2 KB, 1346x680, Firefox_Screenshot_2018-10-24T03-32-41.111Z.png)
100% cure rate
>100% cure rate
100% cure rate
>100% cure rate
100% cure rate
>100% cure rate
100% cure rate
>100% cure rate
100% cure rate
>100% cure rate
100% cure rate
>100% cure rate
100% cure rate
>100% cure rate
>100% cure rate
100% cure rate
>100% cure rate
100% cure rate
>100% cure rate
100% cure rate
>100% cure rate
100% cure rate
>100% cure rate
100% cure rate
>100% cure rate
100% cure rate
>100% cure rate
is it already over?
>>180822
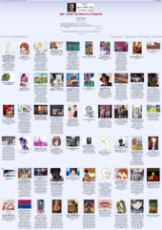
I had to go to bed early, but here is one capture of the catalog, before they started to purge some threads starting with the comfy thread I think (was first I noticed getting shoad).
I had to go to bed early, but here is one capture of the catalog, before they started to purge some threads starting with the comfy thread I think (was first I noticed getting shoad).
>>180823
There's still a Gene Shalit thread up for some reason, but regardless we need to work on our strategy to be more effective.
There's still a Gene Shalit thread up for some reason, but regardless we need to work on our strategy to be more effective.
hmmmmmmmmmmmmmm
69 replies | 36 files | 28 UUIDs | Archived
