GENERAL DOWNLOAD LINK
https://mega.nz/#F!ZuRigCwA!5d_K9lRKUXdeaDMog84MGg
This Toolkit includes:
~ 250 Retro Games
- Console Engines for 14 Systems (Windows 64 Bits)
- 3 Variants of Patching Programs
- 2 Essentials for MINI SNES Modding
- 1 Piece of Emulator HUB Software
GUIDE INDEX
+ + +
I - Introduction
II - Emulators and Launch Box
III - MINI SNES Modding
IV - Retro Fangames
V - SNES Recommendations
VI - Source Links & Videos
VII - Disclaimer
+ + +
I - Introduction
Do you like old games? Are you sick of Triple A companies releasing overhyped 60 dollar titles with day 1 Patches and DLC? Are you dirt poor? Do you think Darth GayBen is responsible for the necrotic rot of the entire gaming industry? Are You bored to death? Would you rather blow a load of hot lead through your cranium than play yet another Koala Doody?
If you answered "Yes" to any of theses questions, then this guide and it's contents are for You. And maybe even if you didn't say yes, you may still get some use out of this thing. I certainly did.
In this guide I will assist You how to create, set up and play your own Retro Gaming collection with entirely free and (mostly) legal software. You can download them in a neat little toolbox I prepared for You or You can get them yourself from their designated mothersites. Furthermore You will find 3 Step-by-Step instructions with illustrations how to use everything You find here, Some overall advice on games and of course all the source material I drew this from over the last month if You wish to look it up yourself.
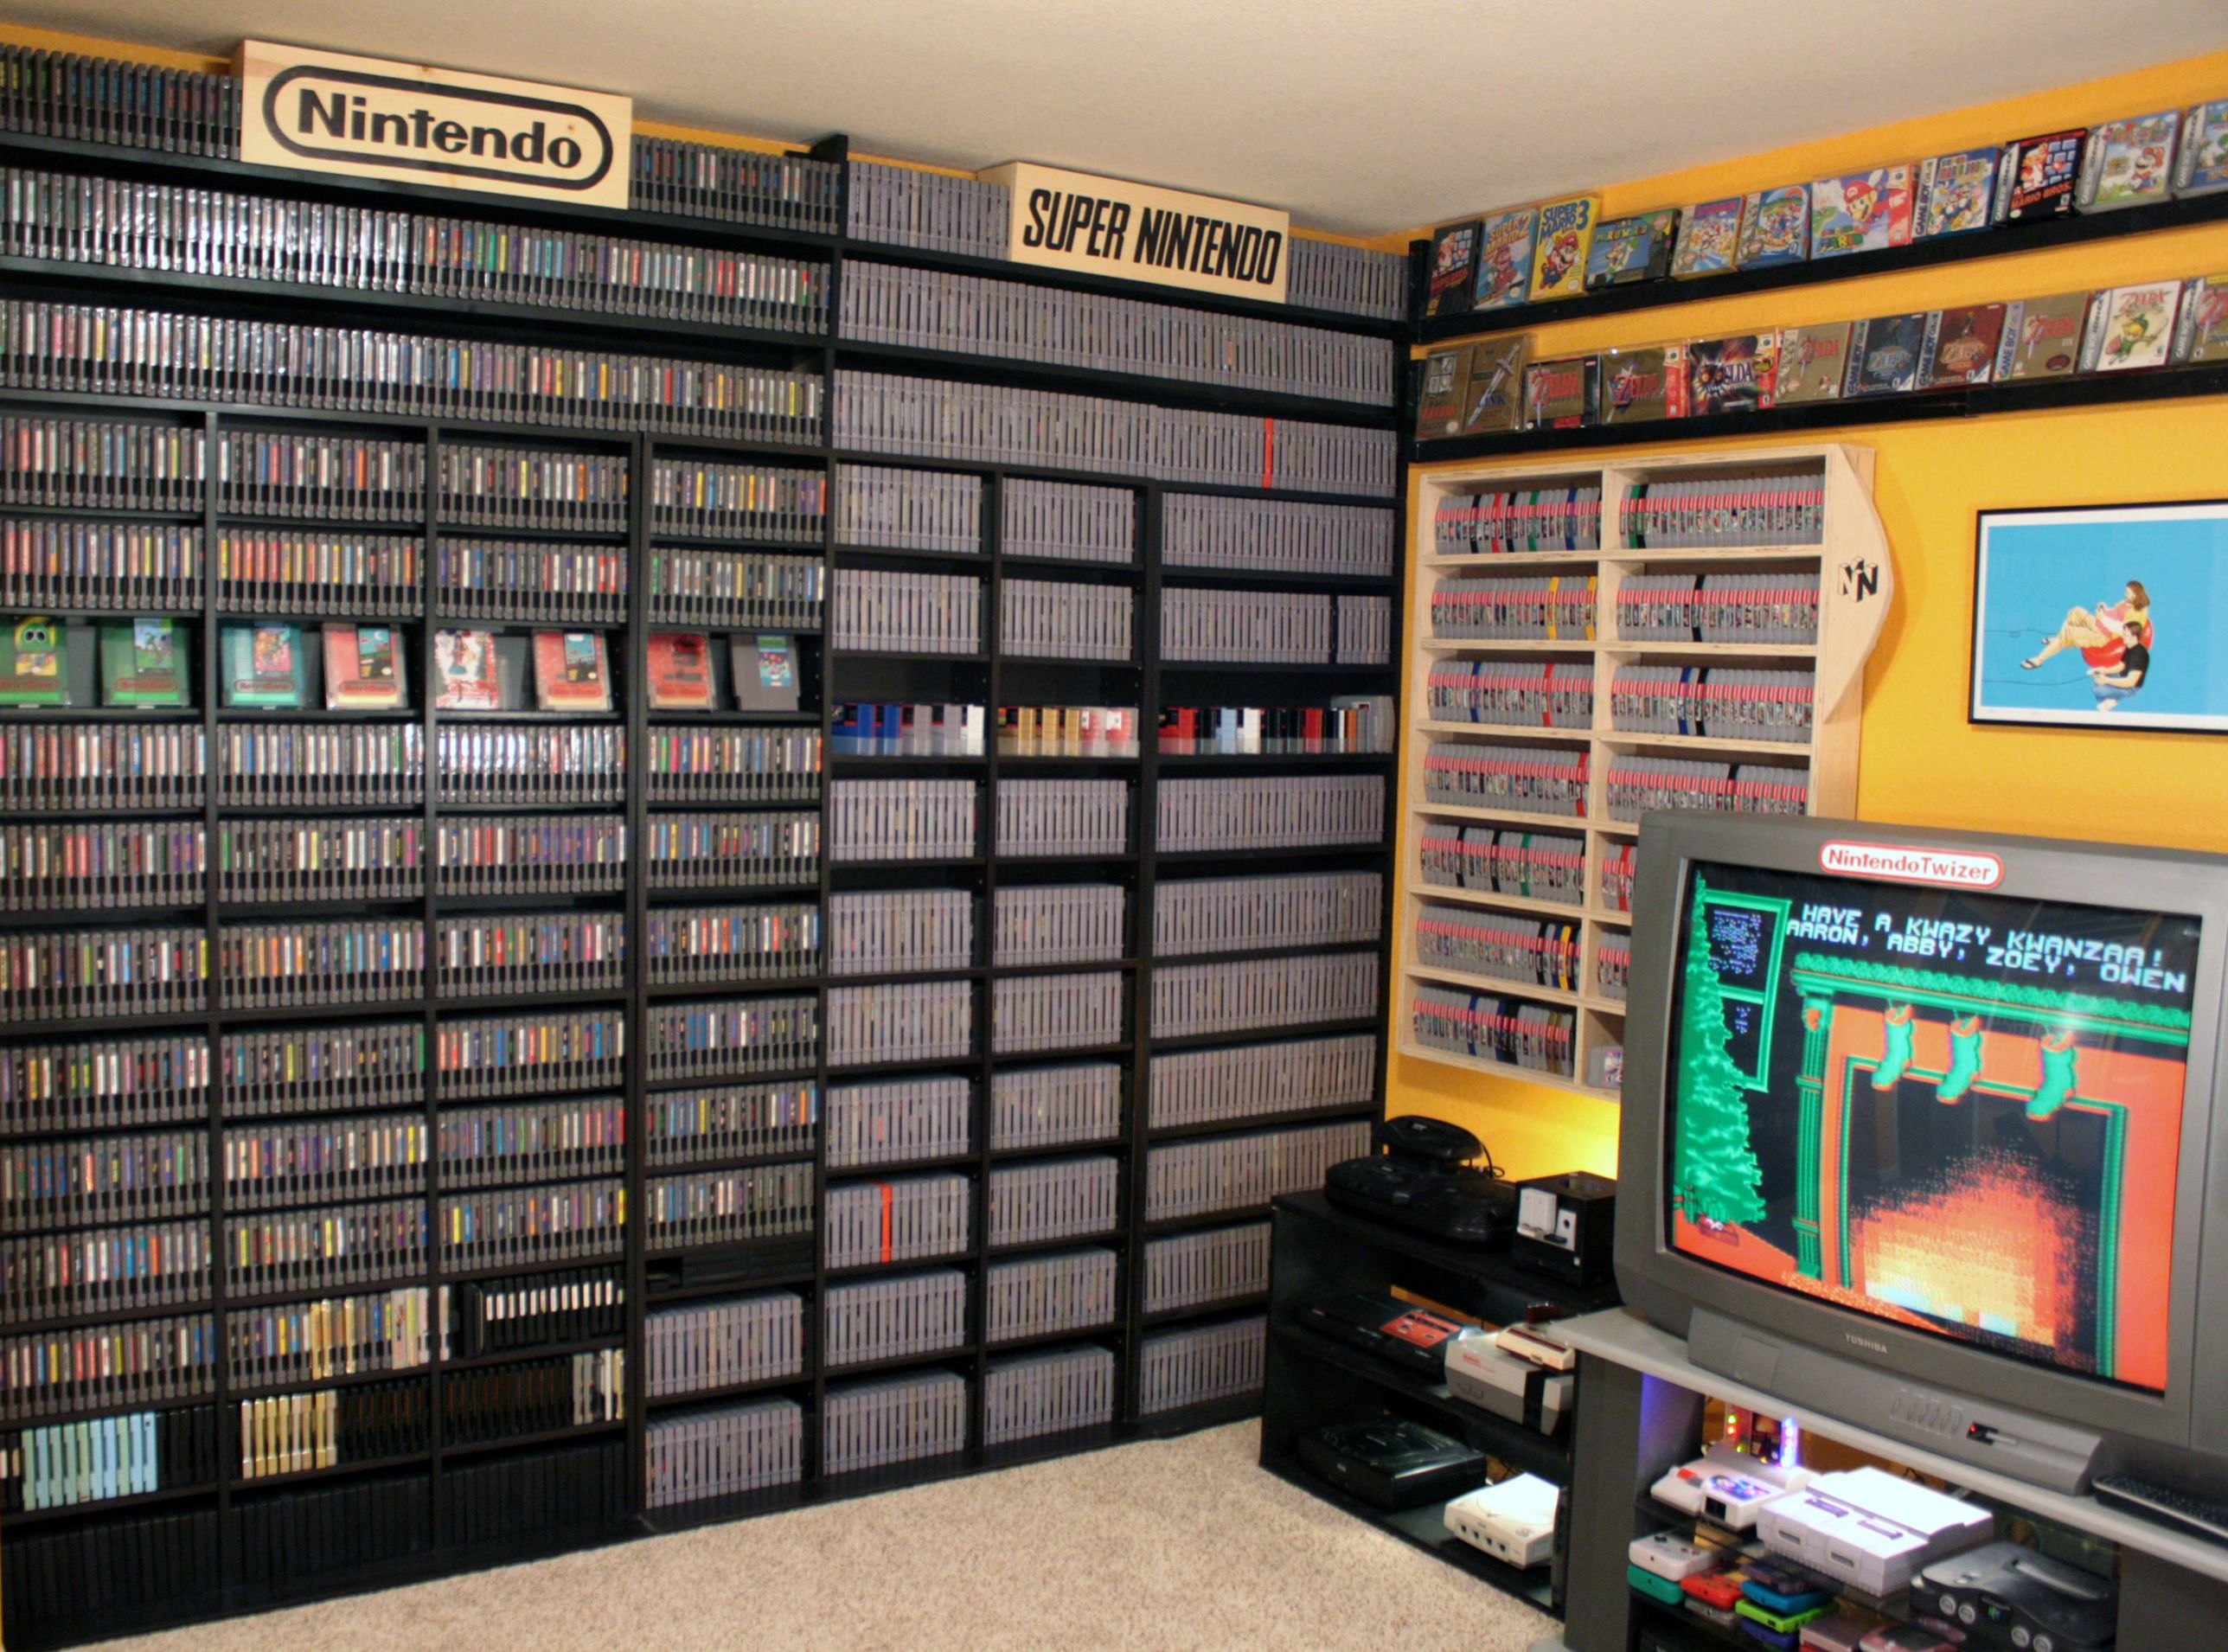
How I came to make this compilation
I myself knew of the existence of Emulator technology since about 2007. At the time I was not into it for a lack of interest in 16 Bit Era Games as I regarded them as outdated. The whole concept of playing old console games on Computers seemed highly sketchy to me and even if i wanted to at the time, I had zero knowledge how to deal with it and was scared off by the potential problems with the law. I basicly ignored the whole emulation scene for the next decade, occasionally watching videos about old games on Youtube.
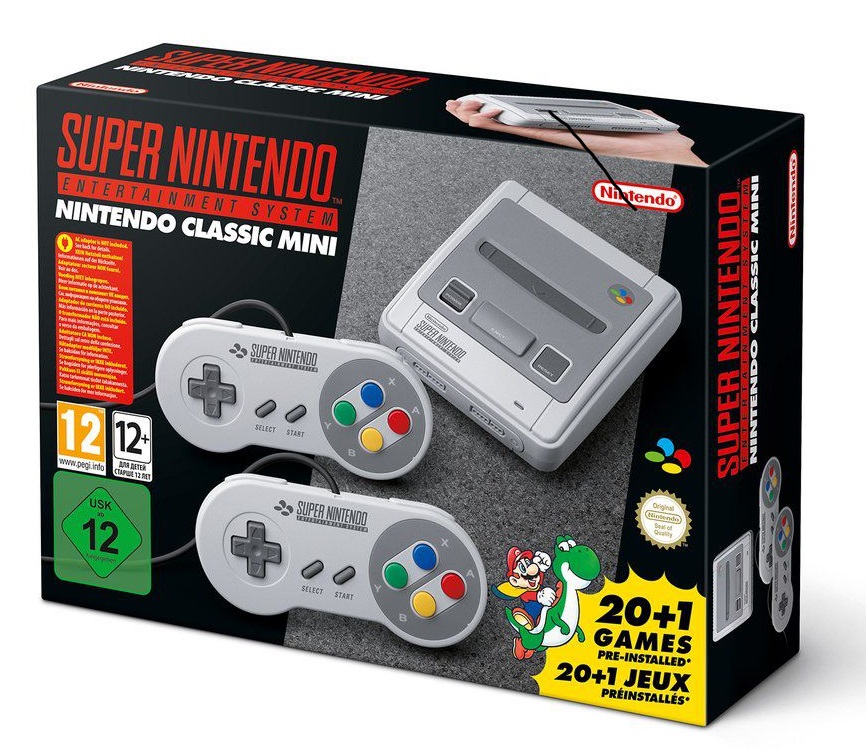
All this changed around the end 2016 when I heard that Nintendo was about to re-release an old Console, a new edition of the 1986 NES, a big game collection in an authentic console case with a new oldschool controller. I was curious about the thing, but my ambition was initially stumped for my own lack of love for the system and it seemingly being limited to its 30 title library. I never ended up acquiring one due to the thing being in short supply and the merchandise falling victim to greedy resell scammers.
Unexpectedly I ended finding a certain Retro Gaming Channel in late 2017 that informed me about the impeding release of yet another new re-release System, The SNES Mini. This one I became genuinely interested in and thankfully the production supply was higher and less pestered by scammers than it's predecessor. I caught wind that people managed to hack the NES and I expected it would only be a question of time until the same would be achieved for this version. To my luck I ended up getting one of these MINI SNES' gifted, got into roiding up my machine shortly after and eventually all this culminated in putting together this bulk of text.
But thats enough about that. Before you fall into a Coma lets get right into the meat.
/vx/ - Videogames and Paranormal
File (): 73E6D7EB4B1FC77E26BAB2109EA8B2FD-740080.jpg (722.7 KB, 2576x1910, Game Collection.jpg)
File (): A0BFB7E5A0978C911A4CAFEC6C96C0F2-234291.jpg (228.8 KB, 866x754, MINI SNES.jpg)
File (): 3CE2D6E850FA07992287360170CA2B36-128043.jpg (125.0 KB, 1050x700, SNES 9X Controller.jpg)
File (): 790E27C6337C3CCD9FE8658A39564929-201673.jpg (196.9 KB, 1280x720, Launchbox logo with games.jpg)
File (): 8F02EF84495D55172FA23FD3D5F909E6-338045.jpg (330.1 KB, 3288x708, Launchbox I - IV.jpg)
File (): F37877FF1A8B52F7301291DA3C5E8822-1002605.png (979.1 KB, 3212x912, Launchbox V - VII.png)

File (): 7AF48A47B1E2C8F95830EF564BD8E455-449271.jpg (438.7 KB, 4182x1080, Launchbox VIII - XII.jpg)
II - Emulators and Launch Box
Before we get started I'd like to mention something of great importance:
ORDER
I strongly advice You download all the Emulators You need and ROMs you want to play beforehand.
Construct a clearly labeled and easyly accessable directory of Retro folders so that you can find all your Data swifly when You need it.
The better You do this, the less problems You will have later on. Take your time with it. You will thank yourself later.
A clear file regiment is half the work done.
A word on the Emulators themselves and Launchbox
Emulators are privately produced software You use to run your old console games on. They imitate the related mothersoftware and give You an opportunity to enjoy almost any system on pretty much any device that is currently around. Emulation on PC is of course the most common and easiest to do. You can download these programs on the sites of their related creators and often also on places who offer ROM-Files for download.
It is close to impossible to cover every existing Emulator with just one guide, all of them look and work slightly different, but they all have one thing in common: The goal is to play games and most of them work straight out of the box without further instructions needed. You start them up, slap in the ROM and there You go.
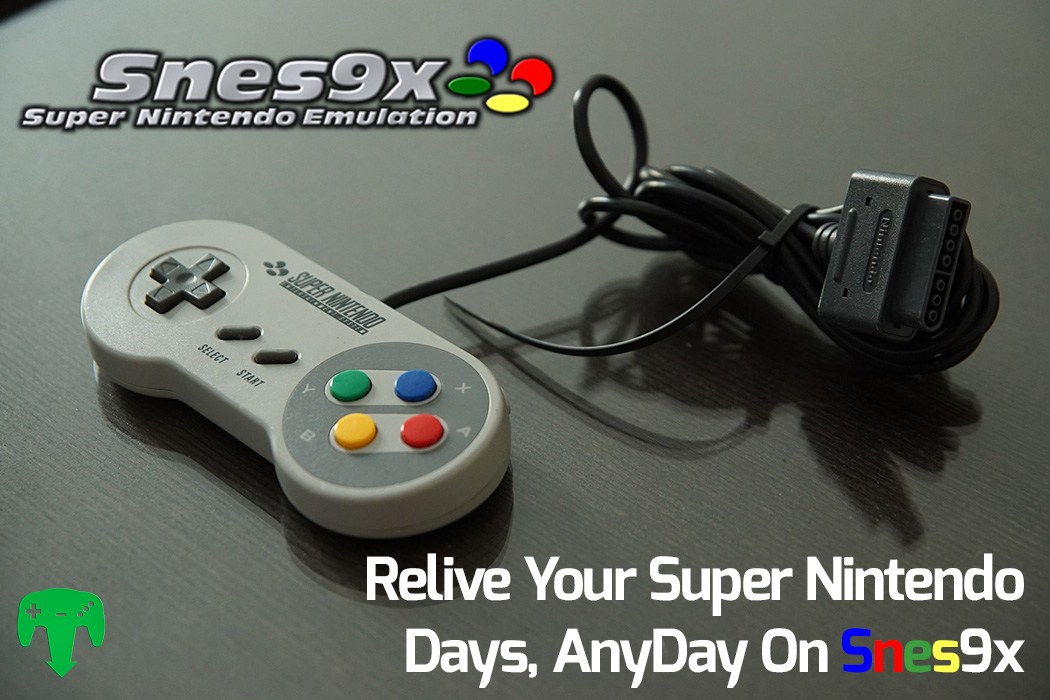
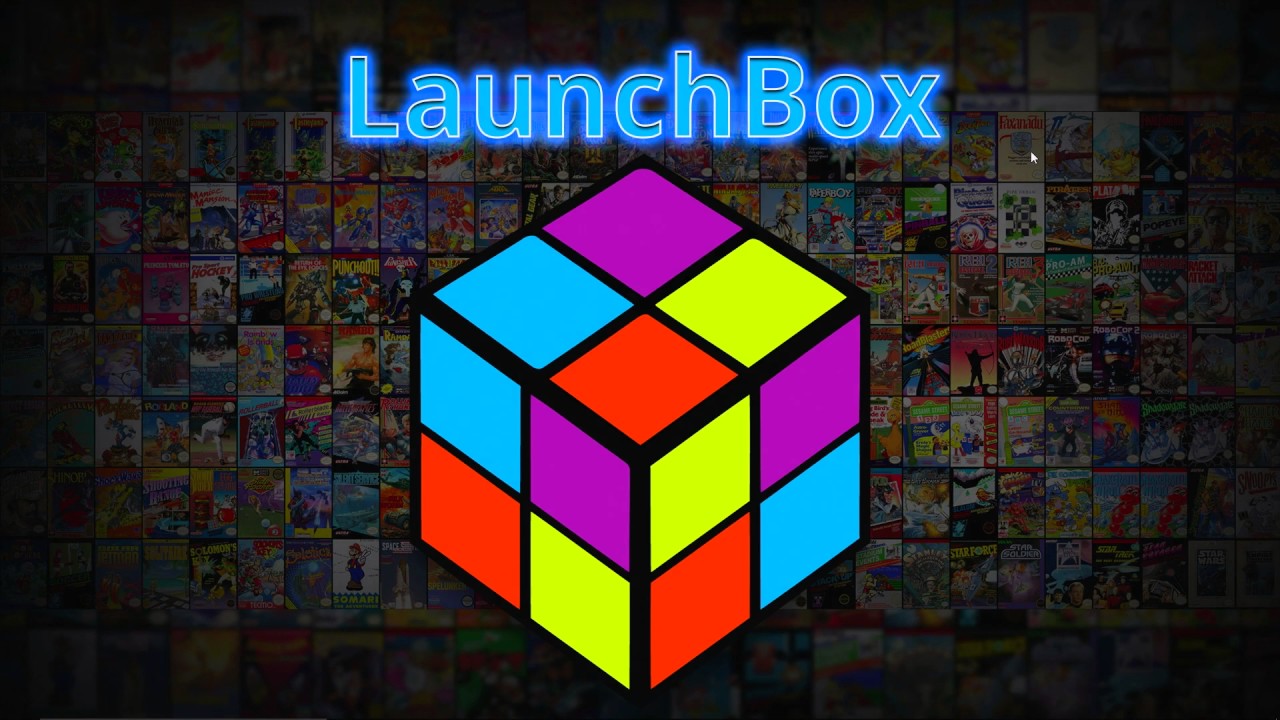
For the purpose of this guide I will stick with the Super Nintendo Emulator SNES9X and a piece of free Software called "Launchbox". Launchbox is entirely optional for the use of Emulators, however it will give you the opportunity to equip your ROM Collection with a neat looking overlay that enables You to play your Classics in a connected HUB with the graphical flair of something you can compare to STEAM. With that said, let's get going.
Click here for an illustrated guide > https://imgur.com/a/tJ2P5
1. Decide what System(s) You want to play.
2. Download all the Emulators, Games and (if you wish) Launchbox.
3. Build a good folder structure for your new files.
4. Unpack all ROMs and install all Emulators You desire.
5. Start Your Emulator, Check the Screen and Sound settings for functionality and Map your Controller (if you have one) or Keyboard buttons, so You can play games. **
Your Emulator Games are now ready to play. Go further ahead to make it look nice.
5. Install Launchbox and start it.
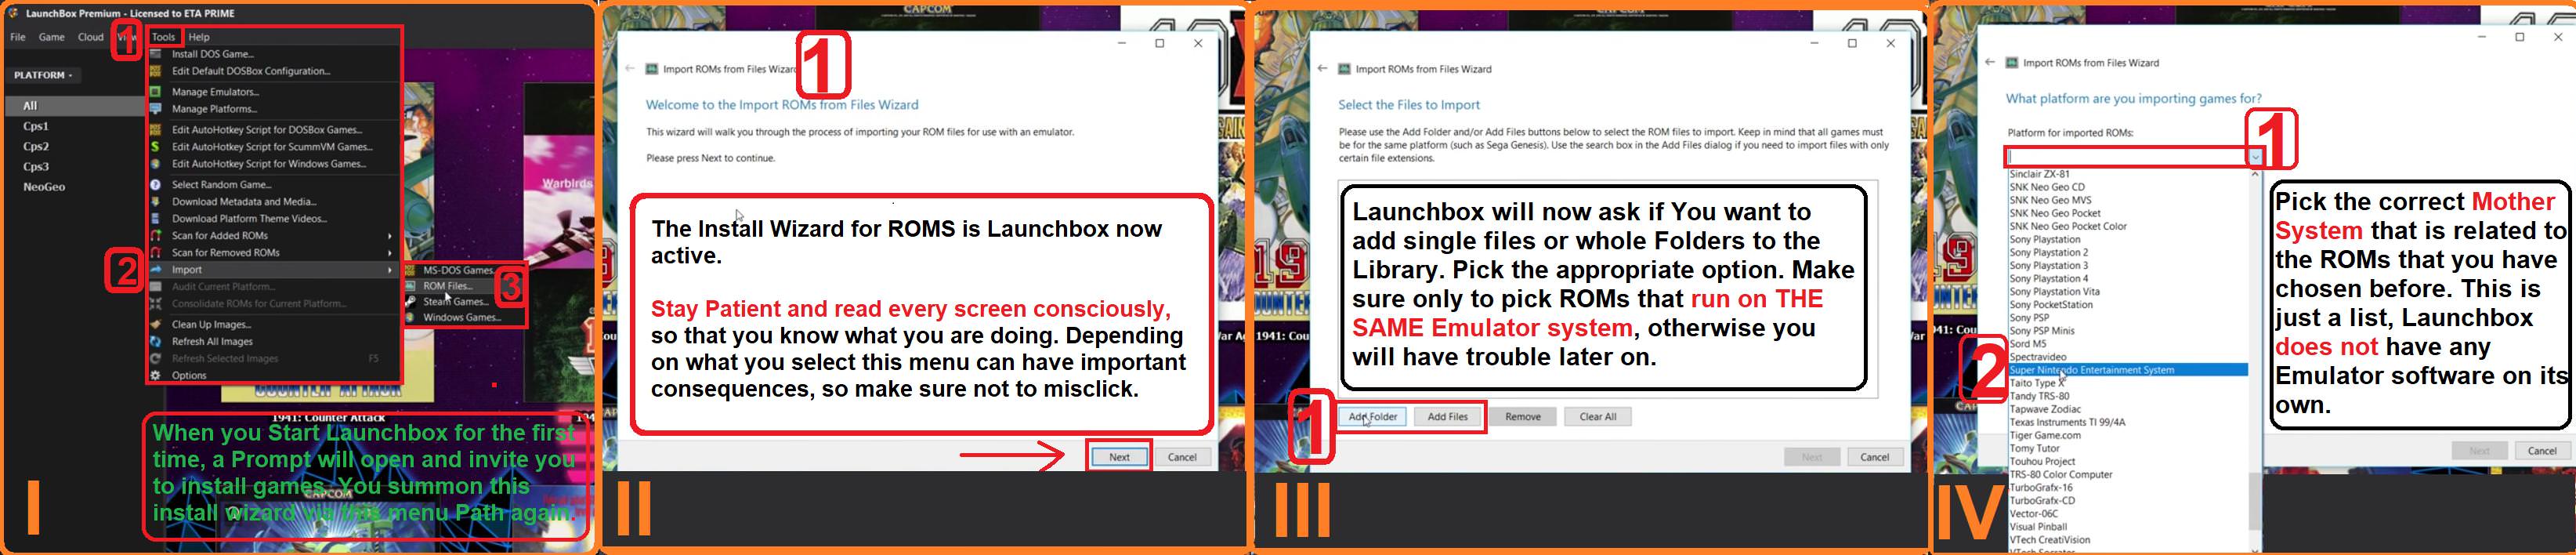
6. Launchbox will greet you with a Wizard to install Games for the first time.
Summon this Install wizard via the Tab Tools > Import > ROM Files.
7. Follow the onscreen instructions carefully so You don't mess up.
8. Select a whole Folder OR a couple of ROM Files You want to upload.
Make sure to only add files that are able to run on THE SAME Emulator.
9. Select the Platform You want to play on from the dropdown menu.
For this guide we use the Super Nintendo Entertainment System.
10.Choose the Emulator you want to play on. For the guide I pick SNES9X.
If you don't already have the Emulator You need, Launchbox will offer you to find download links for it.
11.Select the directory path to .EXE File of the Emulator of your choosing from Your gaming Folders.
12.If you want you can now add extra lines to the booting commands of the Emulator like "-fullscreen".
13.If your ROM Files are in order, proceed. If they are still in Zip Folders add a checkmark at "[x]Extract Rom Archives before running".
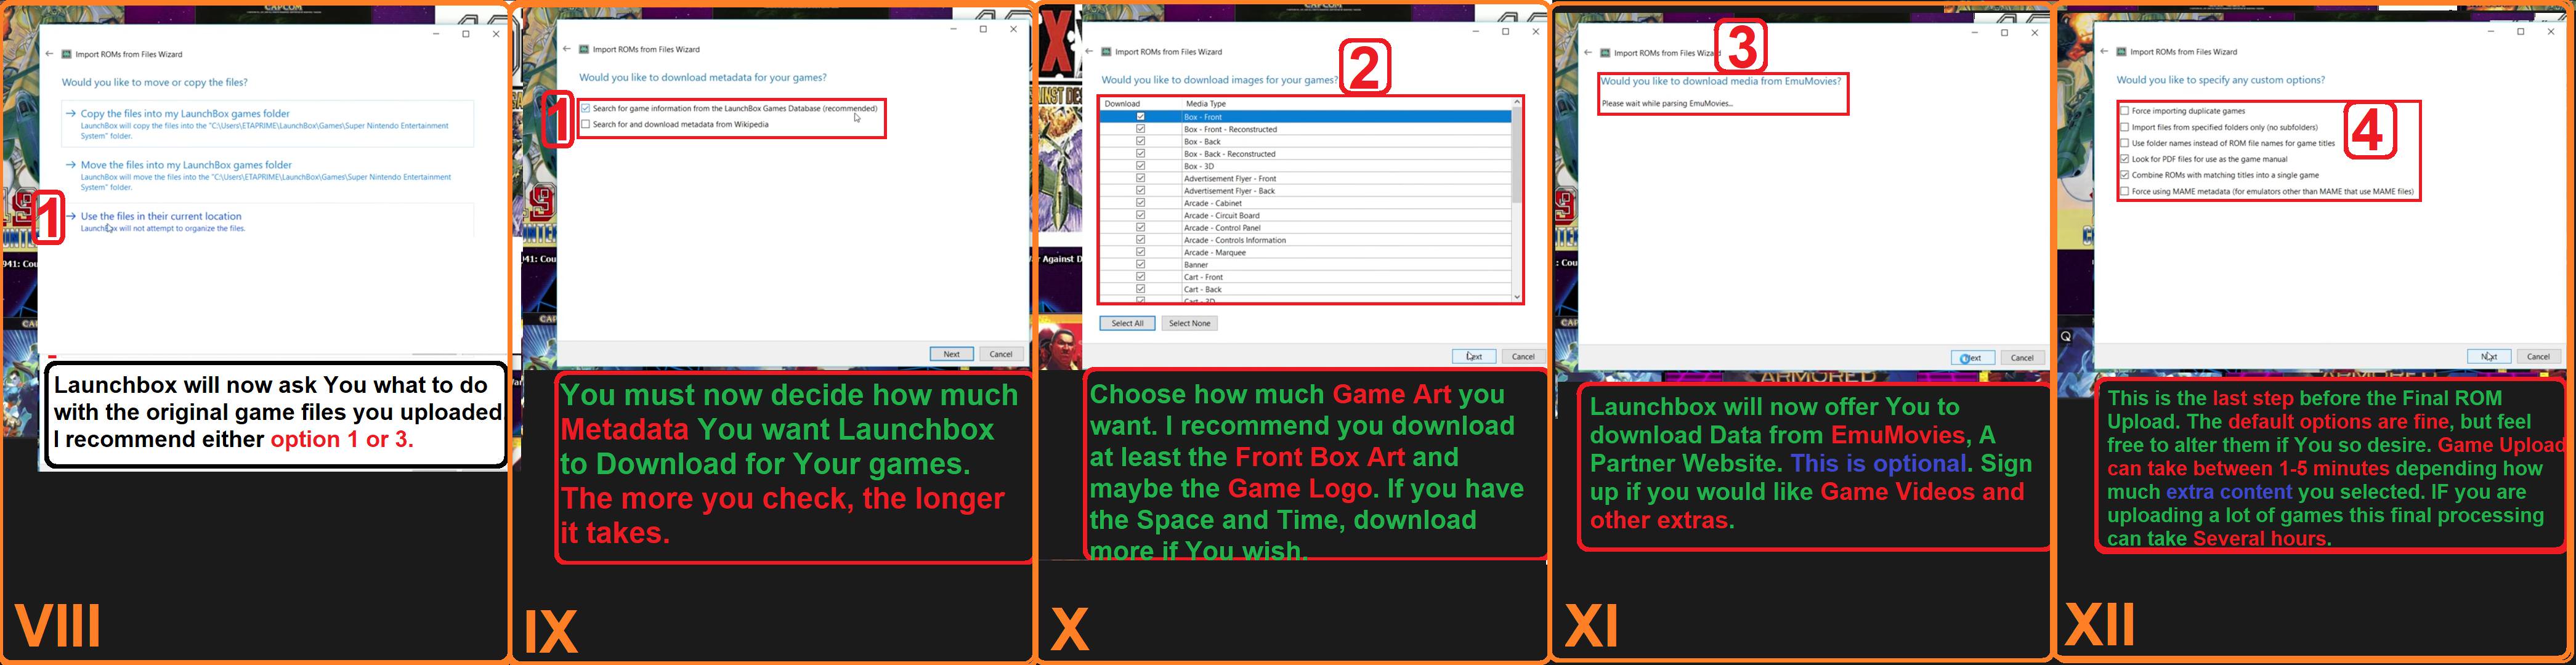
14.Launchbox will now ask you if you want to copy, move or leave the ROM Files of the games you are uploading. Pick what you want.
15.You will now be asked if you want Metadata for your games. This is optional, but enhances the Utility of the Software.
16.Next Up you will be asked How Much Artwork you want for your Library. This is one of the main purposes of this Software. If you have enough Memory Space, proceed. Keep in mind, more checkmarks mean more Download time. All downloads are done automatically, you can change minor errors later via edits. I recommend you download at the very least the Box front art.
17.You will now be offered to upload additional Content from EmuMovies to your Launchbox. This requires a free account and is optional.
If you like Extras as Game Movies or Music consider a look. Otherwise, proceed.
18.Launchbox will now ask you if you want to change any last-minute custom options on your Rom Files before uploading. Read them and decide.The default checks are usually sufficient.
19.You will now get a list of all Games you are going to upload, File directory path included. Look shortly if everything is complete, then Proceed.
20.Launchbox will now upload all your Game Files & Emulators as well as download all Metadata and Art to your Library.
Please be patient. This process can take between a couple of minutes and several hours depending how many Games and much Data has to be handled.
21.Launchbox will send you a textbox with a sound notification when it is finished processing. Do some sample testruns afterwards to see if everything works as intended.
Congratulations!!!
You now have a working Retro Emulator Station with HUB on your Computer! Feel free to add as many additional Systems and Games as Your Machine can handle.
** If you have a sound Error when starting SNES9X on Windows do the following:
install new directX drivers here https://www.microsoft.com/en-us/download/details.aspx?id=35
OR
go to Sound > Settings > Sound Driver > SNES9X Direct Sound
File (): F08D4CE084652621EB5AE9C51C8ABDFB-155937.jpg (152.3 KB, 1175x661, Hakchi and SNES.jpg)
File (): A27714968DA4DC151539E208533EA762-611364.png (597.0 KB, 2532x968, Hakchi I - III.png)
File (): 5C71CDB2CFB7651A2852EF8E6958D468-506367.jpg (494.5 KB, 4606x954, Hakchi IV - VII.jpg)

III - MINI SNES Modding
Click here for an illustrated guide > https://imgur.com/a/aj7Yn
1. Download Hakchi.
2. Download Retroarch with cores (optional but recommended).
3. Unpack the Zips.
4. Prepare your Game Folder with .SMC Rom Files.
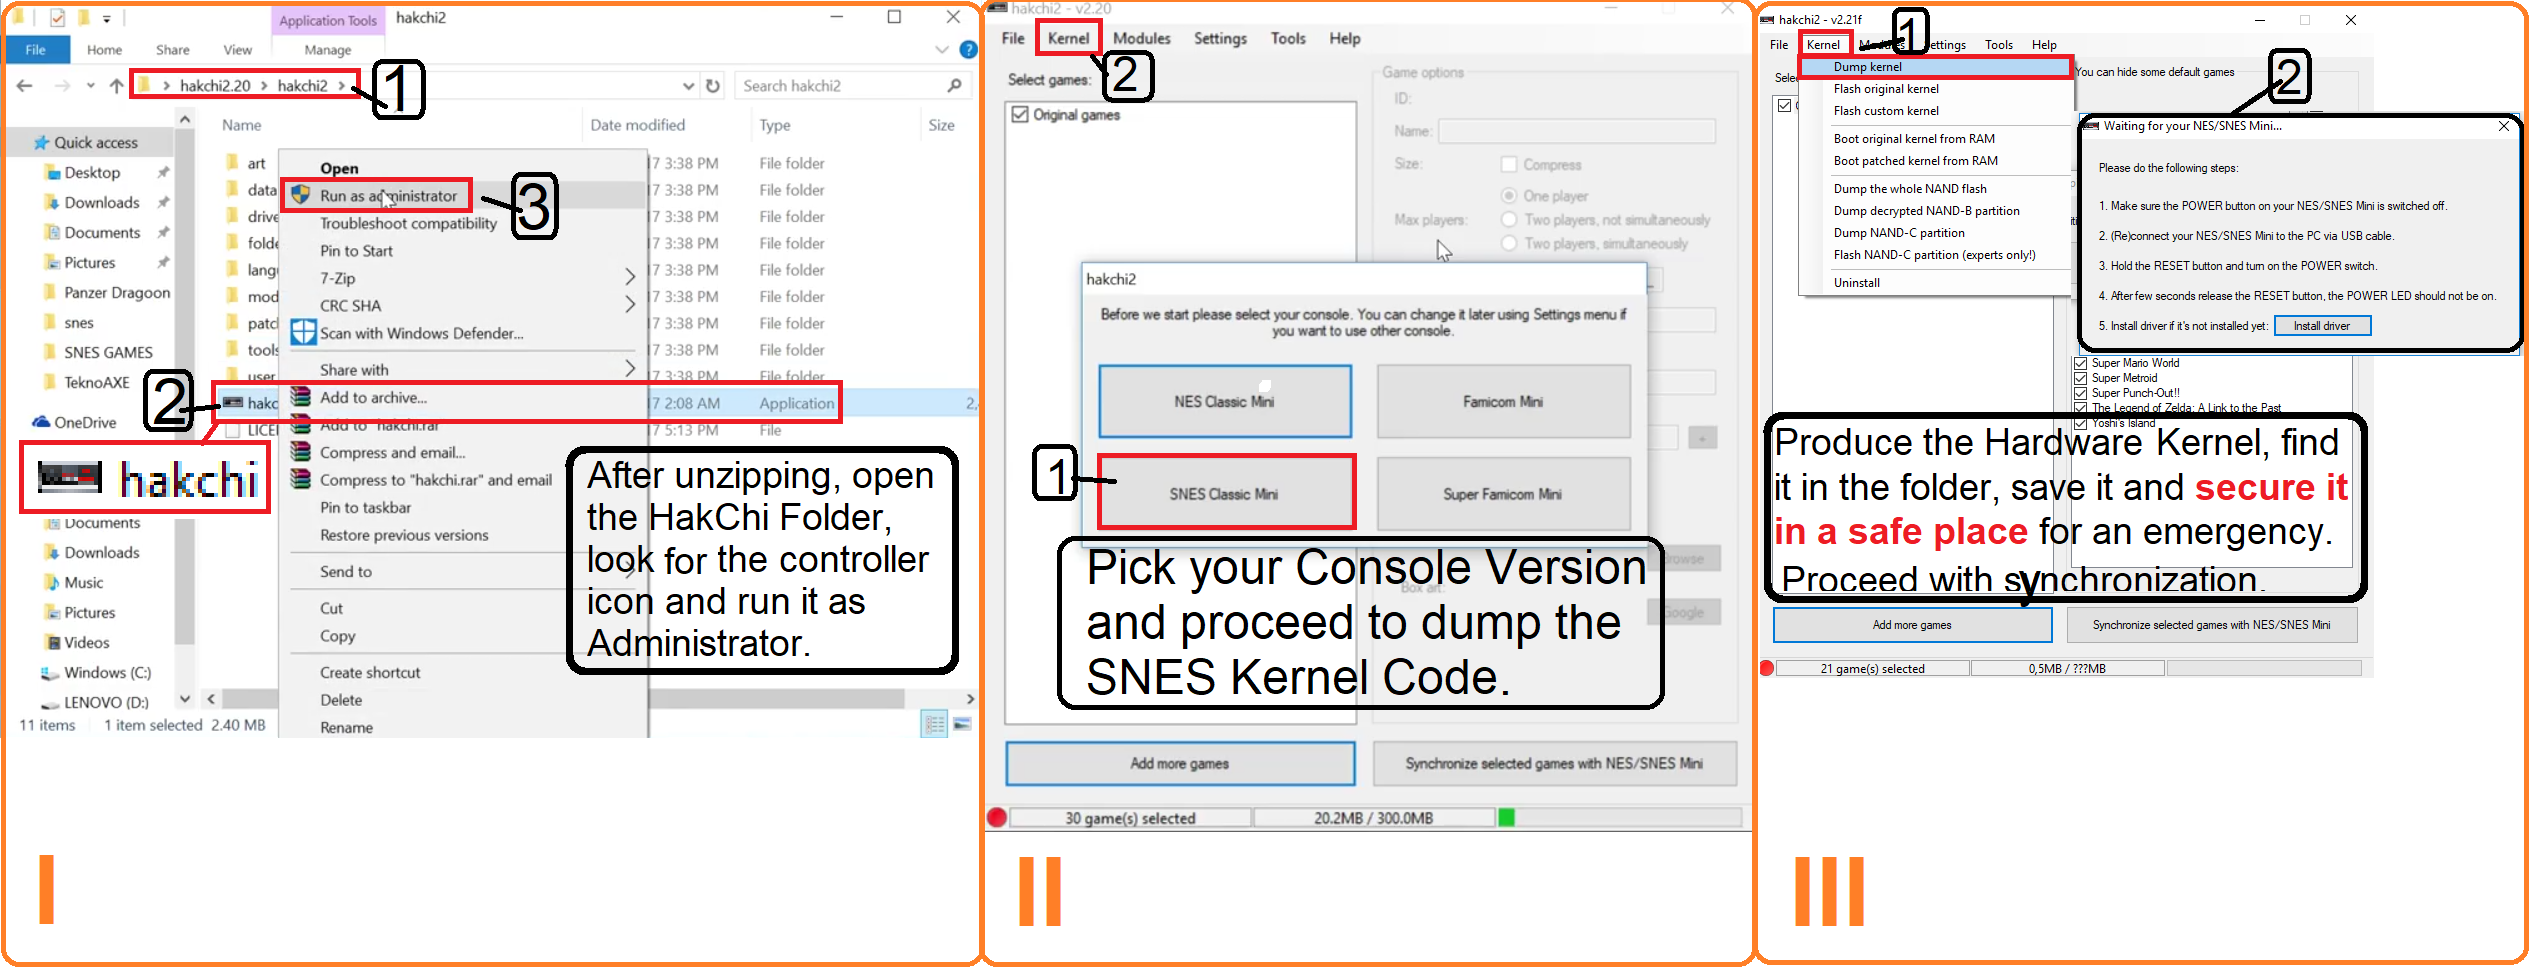
5. Start Hakchi (look out for the exe file with the NES controller icon)
6. Pick a 1 of the 4 offered console versions (SNES EU/US)
7. Connect your MINI SNES with your Computer via the USB plug
8. Turn the Mini SNES on.
+++ IMPORTANT +++
Before You do anything else with your PC or console, it is important to follow a major security measure. In case something goes horrible wrong with your system or you accidently destroy something, You need to do the following as a back up to reset the software on your System.
9. Hakchi will now synchronize with your Mini SNES. Follow the Onscreen instructions. (Hold the RESET Button for about 5 seconds before letting go during Synchronization.)
Proceed with the Synchronisation & dump the Kernel with the source code of you Mini SNES. Retrieve the Kernel dump from your Hakchi folder, make a copy of it and take it a place where it is secure. (Or better yet, Email the file to yourself!)
10. To Rearrange your Ingame Library on the Console, Hit the Tab Settings - Pages/ Folder Structure. Pick an Organisation Format and change the amount of games per page if you wish. Keep it below 30 to avoid errors. This should solve Error 7.
11. (Optional) If you want to Install the Retroarch Drivers for other Emulators, now is the time for that. You can also add additional Mods, if you wish. I recommends the Extra Space and the Reset Combo Mod. Make sure that Hakchi DOES NOT save the Emulator cores as games, but as MODS. It wont recognize them otherwise.
Open the MODULES Tab > Install Extra Mods > Drag the HMOD Files in there > add checkmarks to all Mods you wish to install > Hit OK > Synchonize your Mini SNES.
12. You can now add new Games to your Library via Rom Files. If you Right Click on Games, Hakchi will look up Boxart via google for You, or You can choose Box Art yourself. You can also alter the Game Name and Data on it, if you wish.
Keep in mind that your Mini SNES has a limited accessable memory. You should never use more than 50% of your accessable space. Using Save Files and Save States with so many games costs a lot of memory. Also, newer games (especially from other consoles) chew up a lot of Bytes as well. Pay attention and dont get greedy. Only add games you are personally interested in.
13. If you Add Non-SNES games or encounter files that dont run on the MINI-SNES Hardware, edit the COMMAND LINE in the game Options. Add the line " --retroarch" at the very end. Make sure that you have a suitable core for the System Installed you wish to play. Hakchi will now run an emulator on your Mini-SNES in place of the original hardware. SNES9X is recommended for faulty Super Nintendo games. This usually solves Error 8.
To Enter the Emulator Menu In-Game Hit Select+Start.
14. If you have added all games, mods, box art and Extras you wish to. Synchronize your MINI SNES for a last time to save all your changes.
Exit Hakchi, shut down your console, unplug the USB from your PC and reattach it to your TV. Do a testrun to see if everything works.
File (): 62AC9CB23CCCF4F0A10D63D6BABE2AE9-451132.jpg (440.6 KB, 1442x798, Romhacking Net.jpg)
File (): E51C3FD79DBC2D172FEF4DE91C275E74-257266.jpg (251.2 KB, 2604x672, Fangames I - III.jpg)
IV - Retro Fangames
Click here for an illustrated guide > https://imgur.com/a/UaV53
There have been one a many games released over the years. Some of them were lucky enough to flourish their own community of dedicated fans to make new and exciting content for them.
With this short guide I will explain to You how you can connect yourself to this stream of new Content. This works both for PC Emulators and MINI SNES. It gives You access to a theoretically endless hoard of new Retro Games.
Why can't I find play-ready fangames?
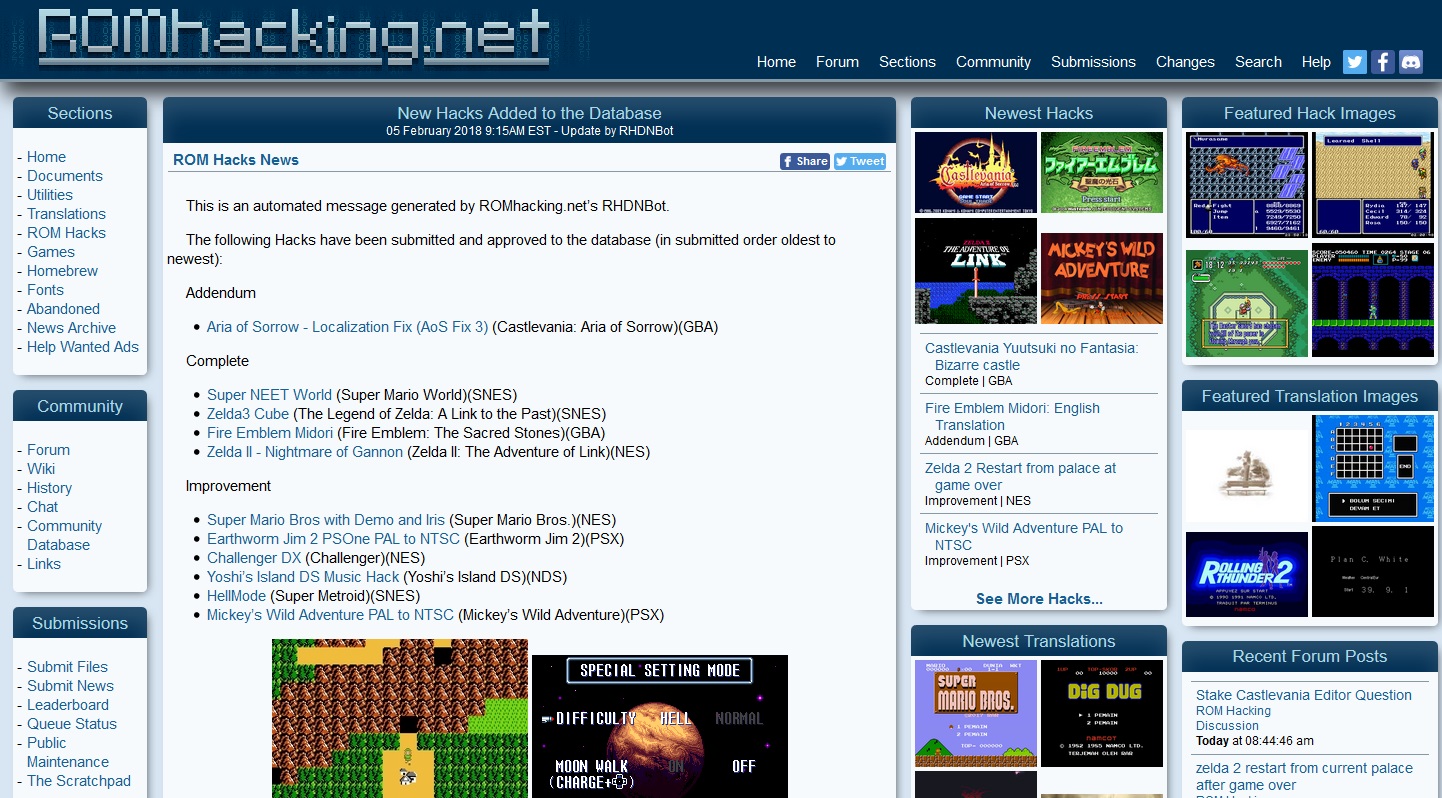
This has technical and legal reasons. Big web Communities like romhacking.net are forbidden to host Game Files of licensed games or to give spotlight to software that has been created by altering the source Code of such. Hosting and Supply of Game Roms is a whole can of worms on its own, but it is sufficient to say, you wont see any websites giving these games out by themselves (for long).
Where can I get the Fangame files?
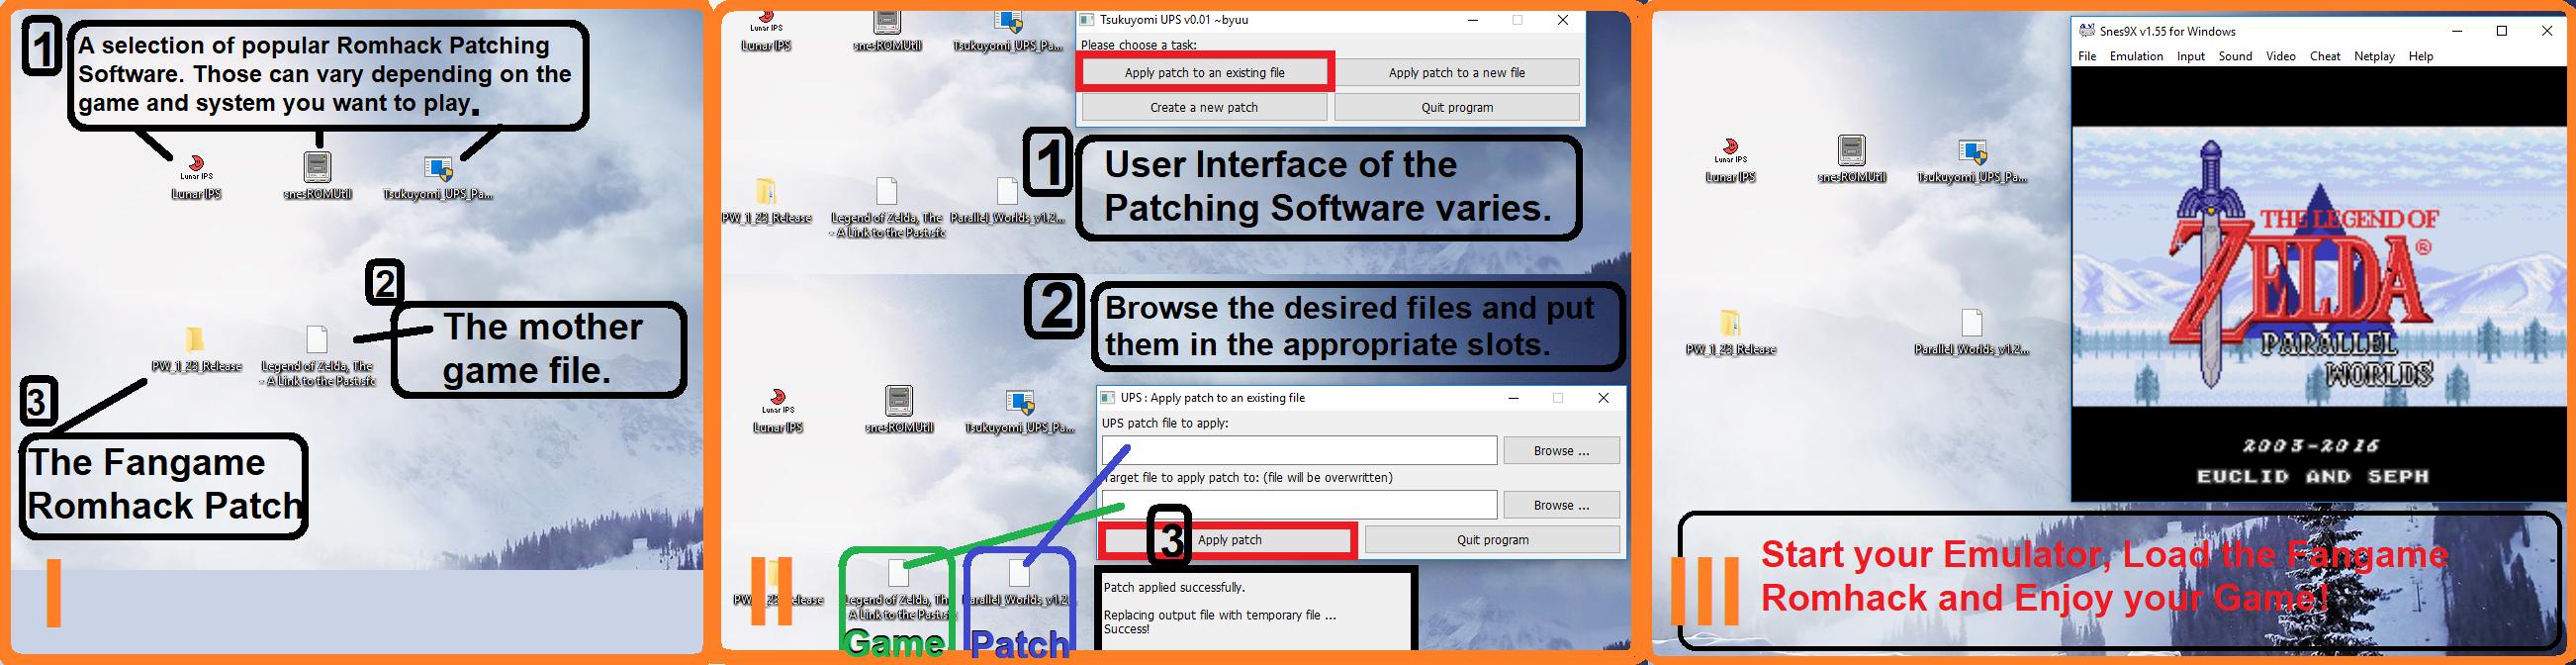
You make them yourself. Literally. This is how you do it:
1. Find out what game your Fanhack is based on.
2. Get a working ROM File of the Base Game you desire.
3. Make a copy of the base game (for security reasons, some patchers use it up)
4. Download suitable Patching software for the game you want
(romhacking.net and others usually offer those)
5. Download the Fangame Romhack you want and find the patching file
6. Open the Patching Software.
7. Put in the Base Game ROM
8. Select the designated Fangame Patch File
9. Apply the Patch
10. The Patching Software will now produce a new, genuine ROM File for You.
11. Open a related Emulator for the Base Game and check if the New Rom File works.
This is a little tough if you have never tried that before, but it soon becomes second nature. Be careful though, some Romhacks end up being faulty due to patching errors or poor coding. This can always happen. After all, those were made by civilians, not professionals.
Never expect a Fangame to work straight away and always keep a copy of the mother File. Test different patching Software if you have to. And if you are lucky and the Creator was worth his salt, You get a shiny new game for yourself to play! Thats about it. Good Luck!
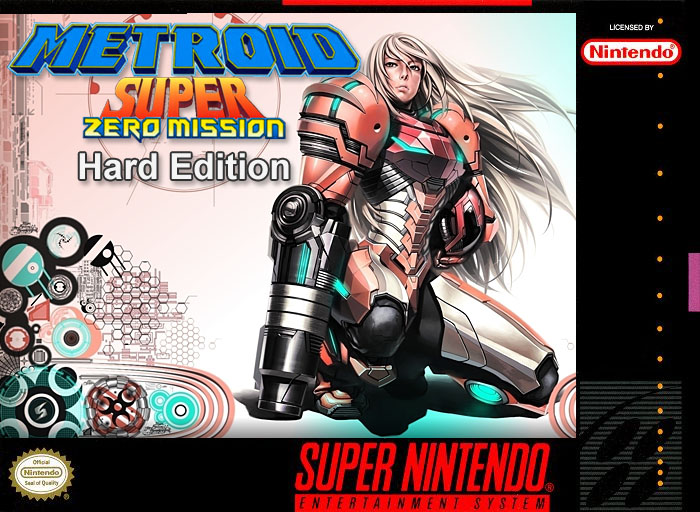
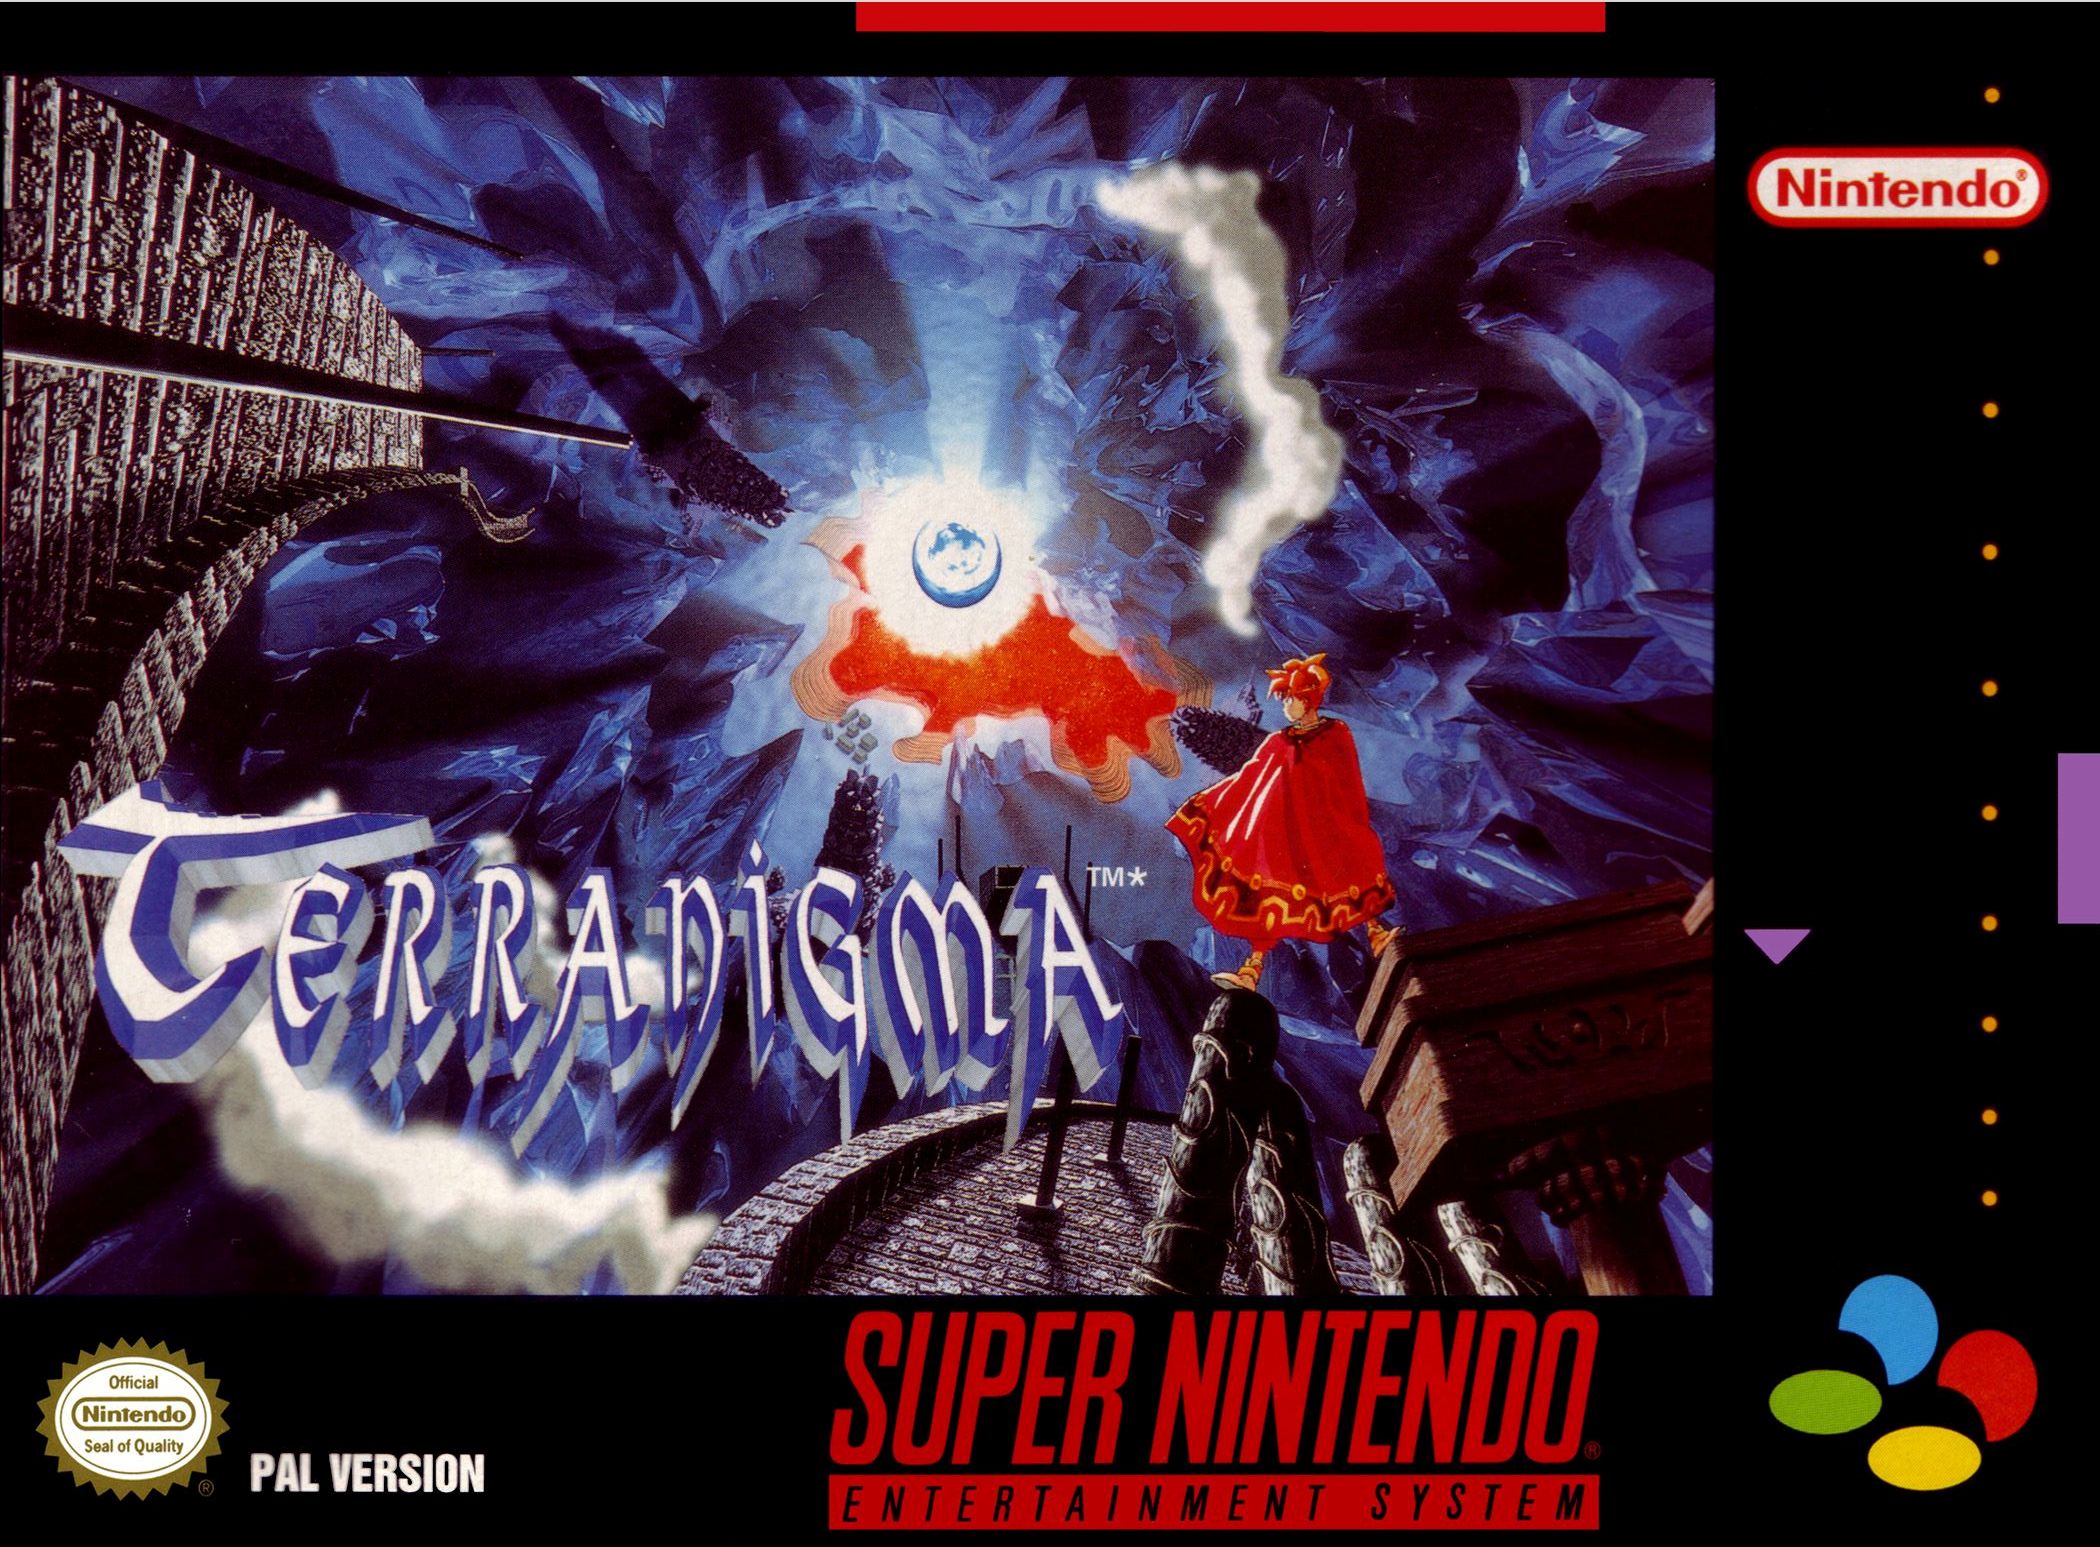
Hint: It is usually a very good sign if people bothered to make Box Art or even a physical reproduction cartridge for a fan game. Chances are that is not only is actually good, but the code is stable enough to run without major problems.
File (): B683CAA923EF844778936483AF82C2D8-2656134.jpg (2.5 MB, 2100x1551, DKC2 Box Art.jpg)

File (): 607794B5F6184CB5F64A88AED12C4E4A-150928.jpg (147.4 KB, 700x512, Super Metroid 2 Box Art.jpg)
File (): E957C808413A04F16DA27068E7A961B9-559079.jpg (546.0 KB, 2100x1547, Terranigma Box Art.jpg)
File (): 964A282F3F79641DB6468FF2355E02CC-3071196.jpg (2.9 MB, 2100x1551, Turtles IV Box Art.jpg)
V - SNES Recommendations
According to Game Collectors, Retro Enthusiasts and the fine people on the Internet the Super Nintendo Entertainment System is a contender for the best Nintendo console, and dare I say even the best Console of All Times. 27 years after it's release, a gallery of almost 1.500 game titles, a flourishing second hand market and fan support to this day this is hardly surprising.
You can think of that statement what you will, but I myself am inclinded to agree. Although I am willing to admit that my opinion on the subject might be more than a little bit biased with this System being the only one being in my possession at the time aside from older Nintendo consoles and an Atari.
After I unexpectedly received a Mini Super Nintendo as a gift for Christmas 2017 and over 2 Decades of not playing any SNES games whatsoever I can say without a doubt that many of these games have aged like a fine wine. I feel at peace when I play them, as if they had returned something to me that time, age and modern video games had ripped from my heart. Sounds maybe very cheesy but this is the best I can describe it.
Since I was around at the time when the SNES was a thing I played a decent chunk of these games when they were new. Therefore I think its appropriate that I give some general specific recommendations about the Do's and Dont's of this machine. Since these Emulators and even the Mini SNES itself are not bound by physics, don't let that limit You if you want to try out exotic titles, of course. (I am only judging you secretly for it.)
What to look out for
The Super Nintendo was not just a great console, it was also the Golden Age for more than a few Companies that made games for it. If you ever wanted to personally witness peak performance Nippon Programming at the Height of its collective career, This is probably the best Opportunity You will ever get in your life.
Titles from the following Developers and Publishers have made the machine as great as it is. Almost all of their releases were even at the time considered modern classics.
Nintendo - The best chef in the kitchen also owns the restaurant.
RareWare - The Donkey Kong reboots and their incredible graphics engine
HAL Laboratory - for Kirby, Smash Bros and general Ball themed games
Intelligent Systems - they later made Paper Mario and Smash Football
Konami - Besides Castlevania they made some of the finest action games
CAPCOM - Excellent Run & Gunners as well as fighting games
Squaresoft - perhaps the biggest RPG makers, even during this period
ENIX - Squares Rival and excellent Action RPG designers on their own
BLIZZARD - Yes, THAT Blizzard. before they became famous they were cool
NAMCO - The company that now owns Digimon, Pacman and Dark Souls
Hudson Soft - the people behind Bomberman
Iguana Entertainment - who later made the Turok Games
IREM - hardly ever saw better Space Shooters
File (): 971C702656408653949290EAF40C6DFF-2103006.jpg (2.0 MB, 2100x1534, Phalanx Box Art.jpg)

What to be aware of
There are some things you need to consider before getting started. False expectations can lead to unwarranted disappointment, so get the biggest of those monkeys off your back.
Processing Power - All Memes and Marketing from Sega Aside, the SNES is in fact objectively slower than it's competitor. While this isn't that much of a deal breaker in most games, it can lead to issues with Racers, Shooters and Beat 'em Up's.
Ports and Sister Games - The SNES has an overall great library of games, there were however some titles that were never released on it. Some were complementary pieces for handhelds, some were released on competitor consolers as completely Original Titles. Check on those to support your system with quality games. Some of them are even better than on the Super Nintendo, no shame in playing those.
Roleplaying Games - Even when compared to today the SNES had a vast, sprawling library of RPG games, including turn based, real time and strategy titles. However, One of the biggest beasts is not here: Pokemon. There are no Pokemon games on the system, that was after the Systems lifespan. If you still have an itch for a Pokemon-esque game, take a look at the Dragon Quest Series and Robotrek. If you got to have a Pokemon game, use an Emulator and Play Silver from 2001 or the Leaf Green remake from 2004.
Licensed Games - Licensed Games based on other Media have a generally bad reputation. For very good reasons. Many of those games are cheaply produced uninspired cash grabs from studios who could not make a fun game if their life was on the line. Every now and then there is a beautiful flower growing out of this dungpile. Keep a look out for those. Generally speaking, Take Disney over Warner, DC Over Marvel, Star Wars Over Star Trek and ignore anything else out of Hollywood. If the AVGN made a review about it, you probably don't want to play it.
Controller - Good Periphery hardware is the hallmark of good design and quality craftsmanship. The Super Nintendo Controller is no exception to that, to the point where sheer shape of the thing has become a symbol for gaming in itself. If you choose to play on PC and want to enhance your experience, i strongly recommend that you make a small investment and buy a USB Reproduction controller, (if you dont already have one.) You can get decent ones for less than 10 Euros each and they will make it worth your while.
Missing Genres - There were some kind of specific games that simply did not work in a 16 Bit Environment, be it for the technical limitations or by design. Some of them simply worked out a lot better on later Console generations. There are no FPS or Stealth games here. Racing Games and Flying Simulators were just out of diapers. And Strategy Games worked way better with a mouse. Someone attempted to make a DOOM Mod, but it was simply terrible. That's just how it is.
Sports Games - Sports games are much like Licensed Games. Quite a lot of them are just in their for the revenue selling big names. Personally, I was never too thrilled about them unless they had a twist that made them unusual, but that is just me. Doesn't mean they are all terrible though. There are legitimately good Sports Games. Sadly, If you played on of them for a certain Sport, you played them all. My advice is, find the branch leader of the sports You like and stick with them.
File (): 3CEFF6886DD211447B805819D9E8AF75-109922.png (107.3 KB, 1472x628, Vimms Lair Logo.png)

File (): 7BDA9D5F149C01941EE3B6D830DD91A1-263970.jpg (257.8 KB, 888x796, Video Game Music.jpg)
VI - Source Links & Videos
S O F T W A R E
>The applications You need to play on your Computer or to mod your console.
Main PC Emulator for the Super Nintendo Entertainment System
http://www.snes9x.com/downloads.php
Active since 2006
Main modding tool for the Mini-SNES
https://github.com/ClusterM/hakchi2/releases - (download the ZIP File on top of the list)
by ClusterM - released on 12 Oct 2017
Minor Modding tool to run Non-SNES on the Mini-SNES
https://github.com/ClusterM/retroarch-clover/releases - (download Retroarch with Cores ZIP)
by ClusterM - released on 15 Oct 2017
Emulation Lair - recent certified Emulator Software for additional Systems
https://vimm.net/?p=emulate
since 1997
Optional Emulator Support
https://www.launchbox-app.com/ - Provides a graphical HUB, essentially a freelance Steam for Emulators
by Unbroken Software - active since 2014
Optional Patching Software for Fan Games
>2 commonly used programs to produce playable Fan Games for SNES Emulators. Covers about 60% of all Fan Mods you will ever encounter.
SNES ROM Utility
http://www.romhacking.net/utilities/593/
by takashi - In use since 2009 - Updated 2017
Lunar IPS Patching
http://www.romhacking.net/utilities/240/
by FuSoYa’s Niche - in use since 2010 - Updated 2015
R O M S I T E S
>This is where you get the actual games you want to play.
Vimm's Lair
https://vimm.net/?p=vault
Active since 1997
Offers playtested Game ROM's, Emulation Software, Manuals, Message Boards and more. Maybe the single best uncensored ROM Site on the Internet for US Releases. I downloaded almost all of my Files for this project from here and can personally recommend this place.
Emuparadise
https://www.emuparadise.me/
Active since 2000
Quite possible the overall biggest ROM Site on the Internet. Offers over 100k games on various platforms with releases for Japan, Europe and the US. If you don't find a game elsewhere, You will most likely find it here.
Rom Hustler
http://romhustler.net/
active since ~2010, updated 2015.
An alternative to Emuparaside famous for their rich library of Playstation titles. Sadly, much like Emuparadise, this site has been partially censored by Nintendo. Regardless of that, You should have little to no problems with titles that were not developed or published by Big N.
Romhacking Network
https://www.romhacking.net/
active since ~2006
One of the biggest Websites on the Internet for Fan-created Romhacks. If you are on the lookout for new versions of your favourites games or just some minor alterations, consider a visit. Not every game is great or functional, but it is free new content and every other month you make a mindblowing discovery! Games require additional Patching Software to work.
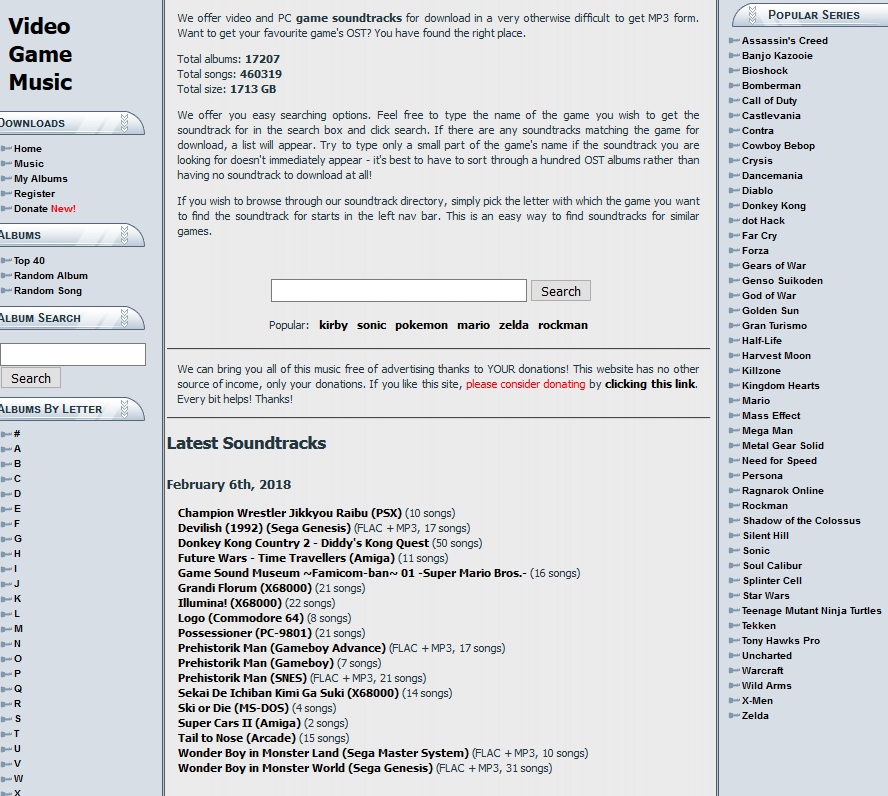
Video Game Music
https://downloads.khinsider.com/
active since at least ~2014
Not a ROM Site per se, but if you are into Retro Gaming or pretty much just Gaming in general, you will most likely have a knack for the music that plays while you do your business. This is the Go-To Place for You. Free Download of single tracks or whole albums from your favourite games of all times and listen to them on your PC, Radio or Phone! Keep in mind that this site has a Blacklist, but the Arsenal is still humongous.
V I D E O S
>A collection of helpful videos from various Youtube channels that will greatly support You with this project and enhance Your experience.
SNES Classic Mini Add More Games Step By Step Using Hackchi2
https://www.youtube.com/watch?v=wHxXor-rzkA
by ETA PRIME - Published on Oct 9, 2017
Active since 2011
Super Nintendo Emulation for Beginners with SNES9x - LaunchBox Tutorials
https://www.youtube.com/watch?v=IO7X0_Cgkgc
by Unbroken Software, LLC - Published on Mar 2, 2017
Narrated by ETA Prime
A tech channel with focus on Retro gaming. Gives reviews of new products, building tutorials and easy to follow guides how to use hard- and software.
World of Longplays
https://www.youtube.com/user/cubex55
active since 2006
The Largest Commentary-Free Gaming Channel on Youtube with thousands of videos performed by skilled Players. Feel free to watch this for first impressions, as a Walkthrough for difficult games or just background white noise.
13 Best Games to Add To Your SNES Classic - SNESdrunk
https://www.youtube.com/watch?v=RPbIr__2cdw
by SNES drunk - Published on Nov 28, 2017
Retro review channel with focus on the Super Nintendo, active since 2013. Consider looking up Videos for quickie reviews, general recommendations and themed lists. The author has a reasonably well balanced taste in games and good knowledge of the subjects in question.
Why You Should Mod Your Super NES Classic Edition (SNES Mini Hack)
https://www.youtube.com/watch?v=7JCoM7ngHX8
by FUgameCrue - Published on Oct 6, 2017
A six minute comedy sketch from a Nintendo focused Gaming News Channel that sums up why and how you should consider modding your Mini-SNES. I also recommend their video on what games to add on the machine.
S O F T W A R E
>The applications You need to play on your Computer or to mod your console.
Main PC Emulator for the Super Nintendo Entertainment System
http://www.snes9x.com/downloads.php
Active since 2006
Main modding tool for the Mini-SNES
https://github.com/ClusterM/hakchi2/releases - (download the ZIP File on top of the list)
by ClusterM - released on 12 Oct 2017
Minor Modding tool to run Non-SNES on the Mini-SNES
https://github.com/ClusterM/retroarch-clover/releases - (download Retroarch with Cores ZIP)
by ClusterM - released on 15 Oct 2017
Emulation Lair - recent certified Emulator Software for additional Systems
https://vimm.net/?p=emulate
since 1997
Optional Emulator Support
https://www.launchbox-app.com/ - Provides a graphical HUB, essentially a freelance Steam for Emulators
by Unbroken Software - active since 2014
Optional Patching Software for Fan Games
>2 commonly used programs to produce playable Fan Games for SNES Emulators. Covers about 60% of all Fan Mods you will ever encounter.
SNES ROM Utility
http://www.romhacking.net/utilities/593/
by takashi - In use since 2009 - Updated 2017
Lunar IPS Patching
http://www.romhacking.net/utilities/240/
by FuSoYa’s Niche - in use since 2010 - Updated 2015
R O M S I T E S
>This is where you get the actual games you want to play.
Vimm's Lair
https://vimm.net/?p=vault
Active since 1997
Offers playtested Game ROM's, Emulation Software, Manuals, Message Boards and more. Maybe the single best uncensored ROM Site on the Internet for US Releases. I downloaded almost all of my Files for this project from here and can personally recommend this place.
Emuparadise
https://www.emuparadise.me/
Active since 2000
Quite possible the overall biggest ROM Site on the Internet. Offers over 100k games on various platforms with releases for Japan, Europe and the US. If you don't find a game elsewhere, You will most likely find it here.
Rom Hustler
http://romhustler.net/
active since ~2010, updated 2015.
An alternative to Emuparaside famous for their rich library of Playstation titles. Sadly, much like Emuparadise, this site has been partially censored by Nintendo. Regardless of that, You should have little to no problems with titles that were not developed or published by Big N.
Romhacking Network
https://www.romhacking.net/
active since ~2006
One of the biggest Websites on the Internet for Fan-created Romhacks. If you are on the lookout for new versions of your favourites games or just some minor alterations, consider a visit. Not every game is great or functional, but it is free new content and every other month you make a mindblowing discovery! Games require additional Patching Software to work.
Video Game Music
https://downloads.khinsider.com/
active since at least ~2014
Not a ROM Site per se, but if you are into Retro Gaming or pretty much just Gaming in general, you will most likely have a knack for the music that plays while you do your business. This is the Go-To Place for You. Free Download of single tracks or whole albums from your favourite games of all times and listen to them on your PC, Radio or Phone! Keep in mind that this site has a Blacklist, but the Arsenal is still humongous.
V I D E O S
>A collection of helpful videos from various Youtube channels that will greatly support You with this project and enhance Your experience.
SNES Classic Mini Add More Games Step By Step Using Hackchi2
https://www.youtube.com/watch?v=wHxXor-rzkA
by ETA PRIME - Published on Oct 9, 2017
Active since 2011
Super Nintendo Emulation for Beginners with SNES9x - LaunchBox Tutorials
https://www.youtube.com/watch?v=IO7X0_Cgkgc
by Unbroken Software, LLC - Published on Mar 2, 2017
Narrated by ETA Prime
A tech channel with focus on Retro gaming. Gives reviews of new products, building tutorials and easy to follow guides how to use hard- and software.
World of Longplays
https://www.youtube.com/user/cubex55
active since 2006
The Largest Commentary-Free Gaming Channel on Youtube with thousands of videos performed by skilled Players. Feel free to watch this for first impressions, as a Walkthrough for difficult games or just background white noise.
13 Best Games to Add To Your SNES Classic - SNESdrunk
https://www.youtube.com/watch?v=RPbIr__2cdw
by SNES drunk - Published on Nov 28, 2017
Retro review channel with focus on the Super Nintendo, active since 2013. Consider looking up Videos for quickie reviews, general recommendations and themed lists. The author has a reasonably well balanced taste in games and good knowledge of the subjects in question.
Why You Should Mod Your Super NES Classic Edition (SNES Mini Hack)
https://www.youtube.com/watch?v=7JCoM7ngHX8
by FUgameCrue - Published on Oct 6, 2017
A six minute comedy sketch from a Nintendo focused Gaming News Channel that sums up why and how you should consider modding your Mini-SNES. I also recommend their video on what games to add on the machine.
File (): C4B7C70240F7A6E47EAE43711C55E199-119922.jpg (117.1 KB, 1000x470, Console Wars.jpg)

VII - Disclaimer
All Software and Files in this package are avaiable for free on the Internet and not intended for commercial purposes, this guide and all images that come with it included.
I am not affiliated with any companies, stores, magazines, websites, communities, Youtube Channels or Law Enforcement related to Video Games or Video Game Emulation whatsoever. Source Code For Games, related characters and Storylines belong to their rightful developer and/or publisher (should they still be a corporate entity).
I am not responsible for any technical damages or legal ramifications that occur for using any of the items in this package. Everything implored by you at credit of any offered guidelines is done at your own risk and volition.
That said I did perform every action instructed here successfully by myself (in some cases) several times and have created working systems completely without prior knowledge of the subject, Programming or Modding in general.
All Files have been checked by paid Antivirus Software and are - at least to my experience and knowledge - Free of Malware, Viruses and Fully Functional after playtesting. Please keep in mind that Minor technical errors are always to be expected when using third party products. I DO NOT guarantee functionality for anything, especially fan made games.
I do not support Internet Piracy, I have never pirated a single game in my life outside of Emulation, I do not produce or peddle ROM Files for profit. I would recommend to anyone with sufficient funds, time and interest to start a physical Retro Game collection by themselves, regardless of the fact that many of the items in question are no longer avaiable for first hand commercial purchase or that their rightholders have seized to exist. Furthermore I'd like to point out that - again to my knowledge - no private entity has been dragged to court or put behind iron bars over 25 year old game files.
All experiences and opinions expressed here are my own as a private undetained travelling vessel. (^._.^)/)
Afterword
I would like to express my gratitude to the many people who made this guide possible:
My Father for gifting me a MINI-SNES for Christmas.
SNES Drunk, for rejuvenating my interest in 16 Bit Games.
FUGameCrue, for giving me the courage to get into console modding
ETA Prime, for his excellent video tutorials.
Cluster M for providing Tools for the Mini SNES.
Vimm's Lair for equpping me with all files I need.
The tireless programmers of Emulation Software
The console game Developers of the 1990's for doing miracle work.
Unbroken Software for offering a Graphical Emulator Hub.
DSPGaming for being the undisputed God King of Gaming lolcows.
Last but not least I'd like to Thank YOU, The Reader.
I hope this guide and it's contents will prove helpful to You and support You in Your endeavors to (re)discover Retrogaming, modding your console or giving you something worthwhile to do. I wish You good fortune and a grand time!
>Written by someone on a Notebook in February 2018.
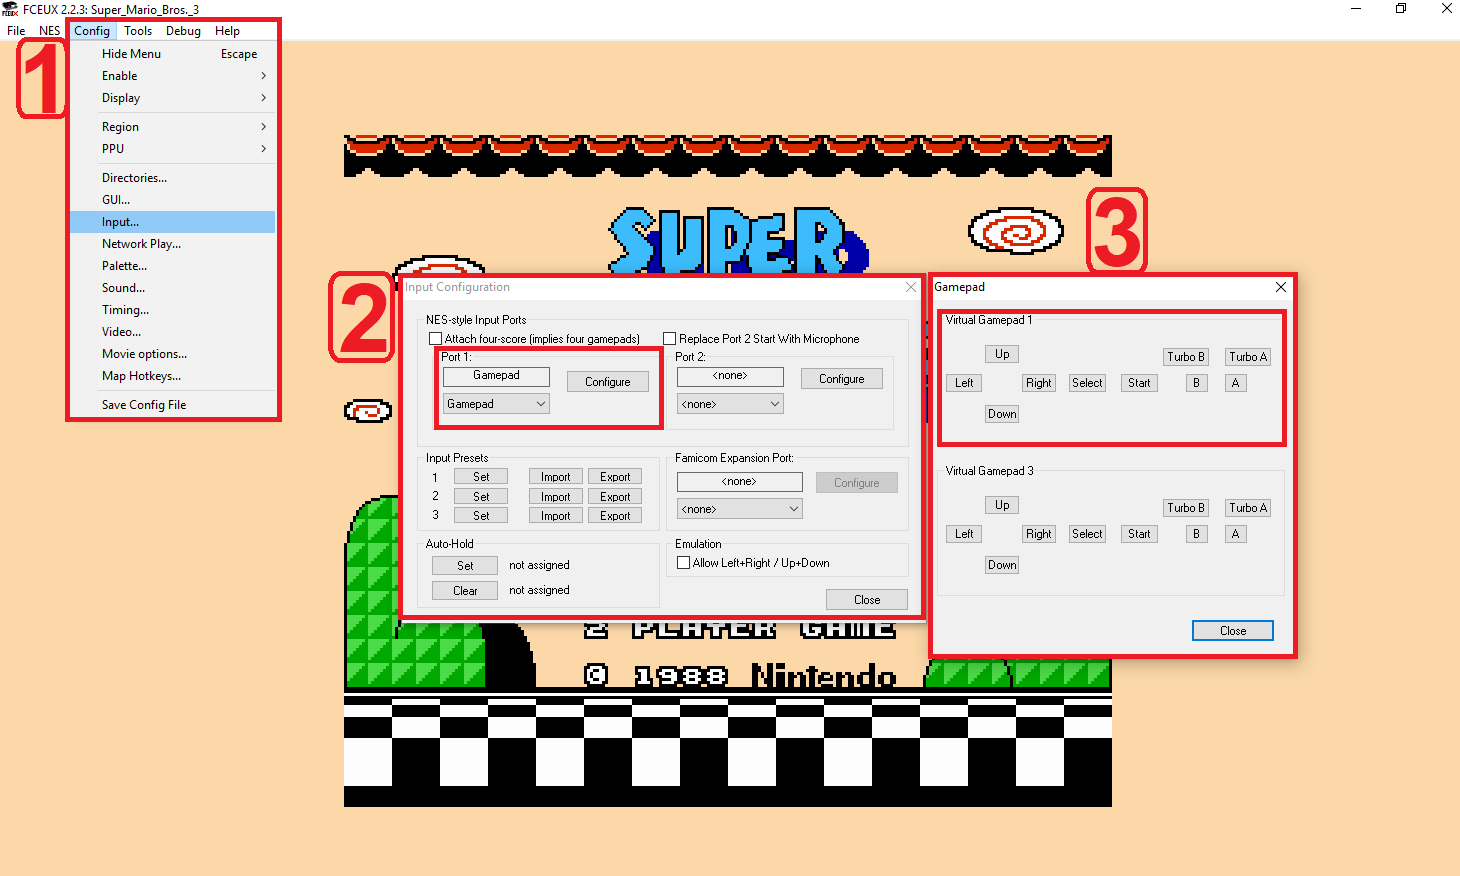
How do I get a PS4 controller to work on an NES emulator, and have certain touchpad gestures perform macros?
File (): 5102D7661C7F4E2DFC91420DD71B96B0-63601.png (62.1 KB, 1460x876, WqTemFH.png)
>>52950
I have no personal experience with Sony or Microsoft console Periphery whatsoever.
Assuming Your controller is otherwise functional and You are using the FCEUX NES Emulator from the Toolkit, follow the steps as pic related.
Every Emulator has of course a different interface, so this procedure will vary depending on the program. Look out for the tags "Input, Mapping, Controller, Game Pad, Configure" etc. and you should usually be successful with little effort.
In Regards to touchpads or macros I can give no advice at all. I dont think most Emulators work with either of those. Consider contacting the Developers of the Emulator in questions or read up on a FAQ to learn more about this.
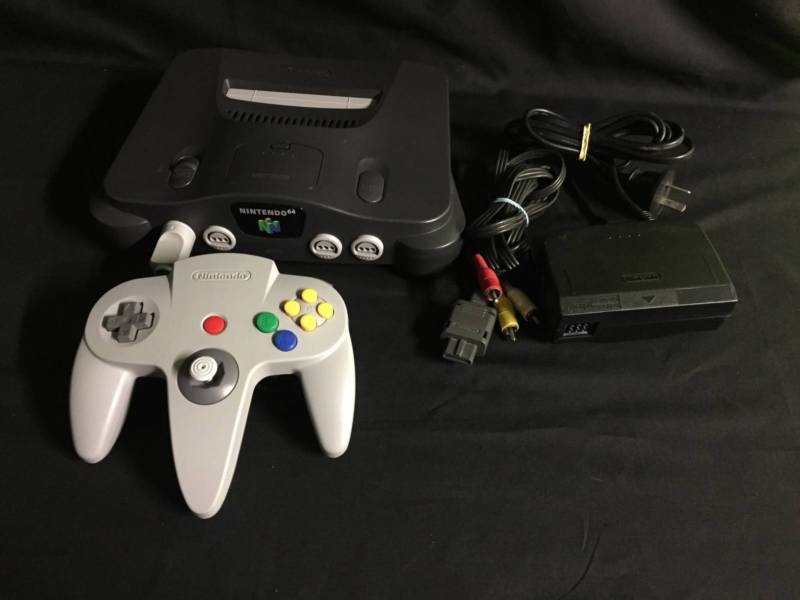
File (): 8EA41B04D4DB6FBF73864F33CB96DA83-29879.jpg (29.2 KB, 800x600, Nintendo 64 Photo.JPG)
File (): 15E556A0550A8E167086EB6B45106957-77157.jpg (75.3 KB, 1023x679, Nintendo 64 Wallpaper.jpg)
I'd like to announce hereby that I have submitted a Databank Update for the Retro Gaming Folder today.
Besides the existing content You will now also find:
~ 80 Nintendo 64 Game Files (as ROM's, circa 1,5 GB)
- an additional N64 Emulator, Project 64 (New Software from 2017)
- Update for the new Launchbox Next BETA (~180 MB)
Since the rumors of Nintendo releasing a Mini N64 Classic in the next 6 - 24 months persist, I figured this would be a good addition to the gallery, in case (You) plan to buy one of these and wish prepare to an Update to your personal hardware. These games are especially relevant if you enjoy Action Adventures, Racers, FPS or Fighting Games. Hope you will put them to good use!
Please keep in mind that the 64 Bit games are more difficult to run than most of the other Games I Offered here before, so please be mindful of errors. I Playtested every single game file and can confirm that over 90% run without any problems whatsoever out of the "box" (on a Computer when used with the Project 64 Emulator, which I do recommend for usage). Additional knowledge for Emulator Plug-In's can be helpful, but is not required to run most of this stuff.
I may or may not end up creating a gallery for the Game Cube some time in the near future. Should this be the case, I will post a notice.
File (): C76BA59FE25929ED07AF868C9E6DD22B-1043691.png (1.0 MB, 1136x1348, __bowser_princess_peach_and_rosetta_mario_series_super_mario_bros_and_super_mario_galaxy_drawn_by_konno_tohiro__09ed90b631d547970a8304f5e628066d.png)

File (): BB452620454382B2A2832AEC40EBAC48-62622.png (61.2 KB, 972x568, Elecom USB Adapter.png)
File (): C57208935A204832C7DBC7F2AF0718B6-61890.png (60.4 KB, 978x730, Emuparadise complete set list NO INTRO.png)
File (): F17002EBAA192825D17AF004CACC7252-68693.png (67.1 KB, 768x770, Romhacking NET Translations.png)
File (): B41037EB0589021411F4C15796F28E93-76128.png (74.3 KB, 1014x772, DOLPHIN Emu Requirements.png)
Alright, time for another Update I suppose.
Due to some provider sided changes to my MEGAsync account I had to do some redecorating to accomodate the folders to the smaller cloudspace. After preparing the files for this event for the past 2 weeks, I think I did reasonably well and argueably crammed more games for in less space in than ever before. But have a look for it yourself. c:
Heres the notes:
- added a Nintendo DS Emulator
- added extra support files to run the Dolphin Emulator
- added ZIP Software (to decrypt the new files properly)
- Removed ALL previous game ROM's
- added ~1.250 Game Boy Games, ~1.900 NES Games, ~1050 SEGA Genesis Games, ~2000 SNES Games & ~1000 Game Boy Color Games (In Total circa. 7.000 unique games)
- All Game Roms are sorted by Language (Japanese/English) and alphabetical order
(dublicates, demos, prototypes, Revisions, Samples, Unlicensed Games, Pirated Games etc. have been removed)
- Added a Folder with ~30 Modded Games (mostly SNES)
- TOTAL Download Size ~3,5 GB
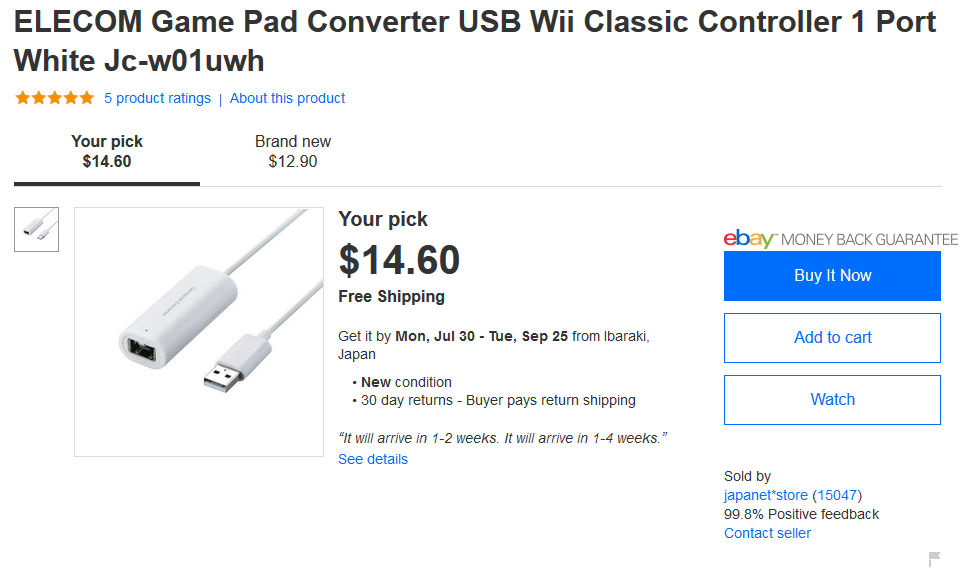
For playing I recommend a Nintendo Wii USB adapter (http://archive.fo/89e3s), who I can confirm also works with SNES Mini controllers and most likely also Wii U pro and NES Mini controllers. Got mine shipped from Japan in ~2 weeks.
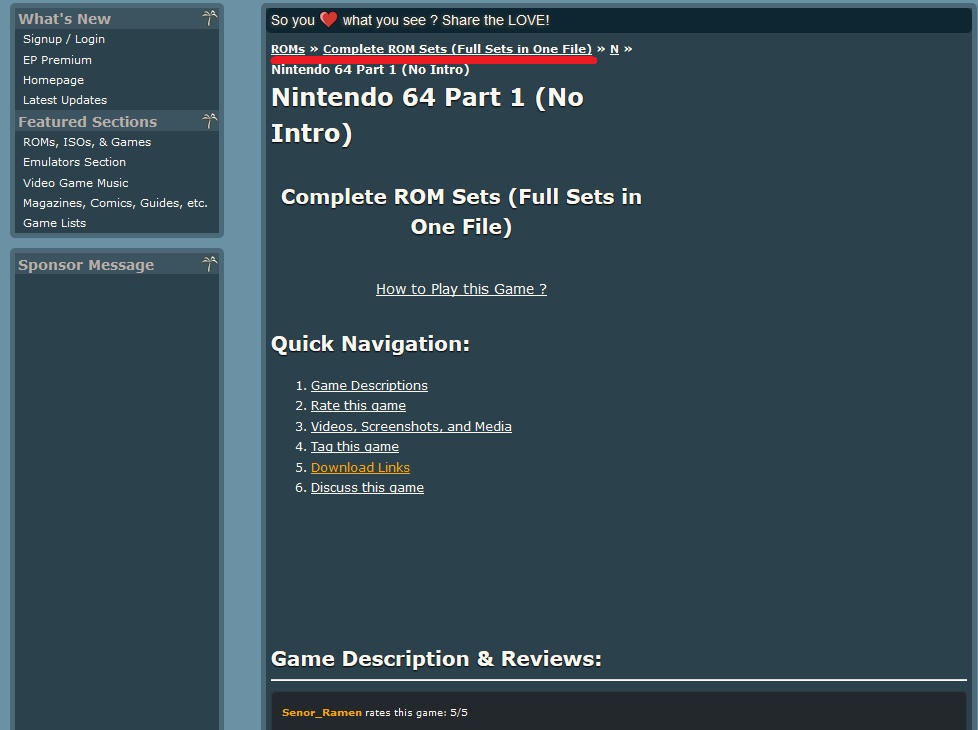
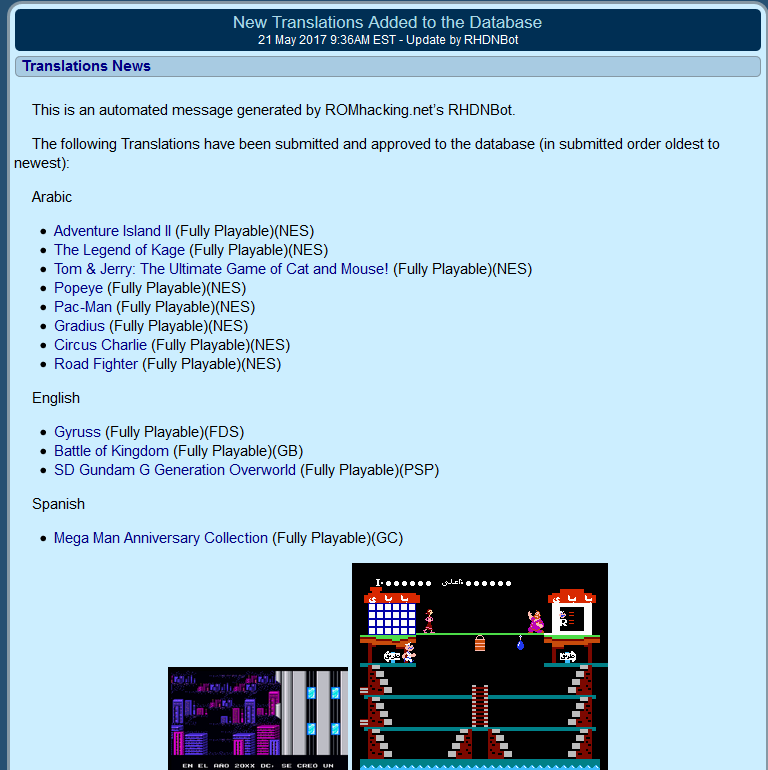
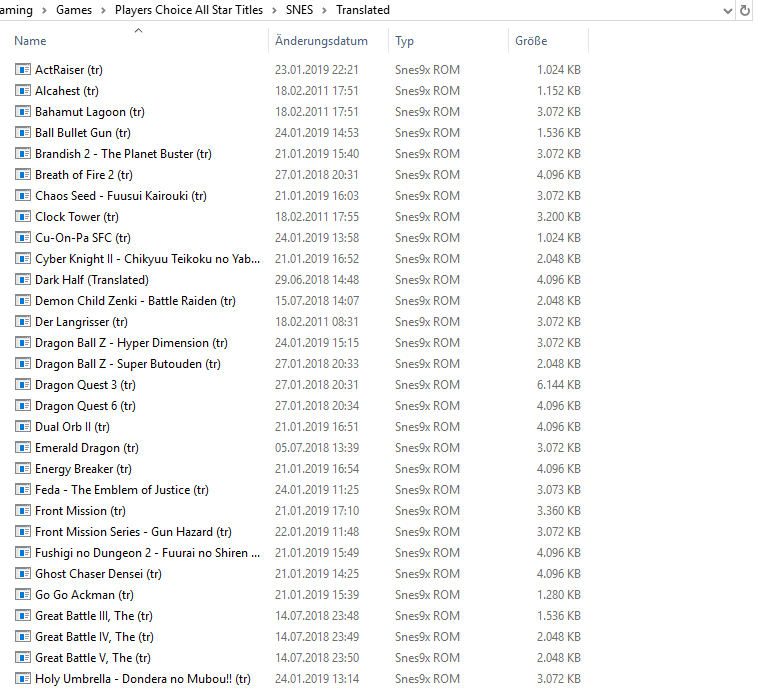
As already mentioned due to cloud limitations I had to removed all game files that go beyond 16bits. If you are looking to play those, I do recommend checking Emuparadise for the Comprehensive Collection Lists from NO INTRO (http://archive.fo/dsmTR). No Intro is a certified ROM Librarian who verifies software for reliable ROM sites such as Vimms Lair. He is also recommended by Retro Gaming Youtubers. For Translation Patches of Japanese Games and Mods please consult Romhacking.net (http://archive.fo/SN1m9)
I would have loved to add the 6 Volume N64 Gallery and the 7 Volume GBA Gallery, but until Megasynch changes its mind or i find another valid file distribution service, this will have to do.
Hope You will put this Update to good use. This is without a doubt the most sourceful library of games I wa sever able to redistribute thanks to the Efforts of NO INTRO. Those are in all likely more games than a single man can play in a lifetime. Please keep in mind that these lists are completely uncurated as far as game quality is concerned, so feel free to eject titles (You) consider unworthy. (∩✧ω✧)⊃━☆゚.*<卐3
---------------
Additional Notes on Gen 4/5 Emulation:
If You are interested in playing Game Cube and Wii Games, please see this video:
https://www.youtube.com/watch?v=cPy0VBV5Q0Y
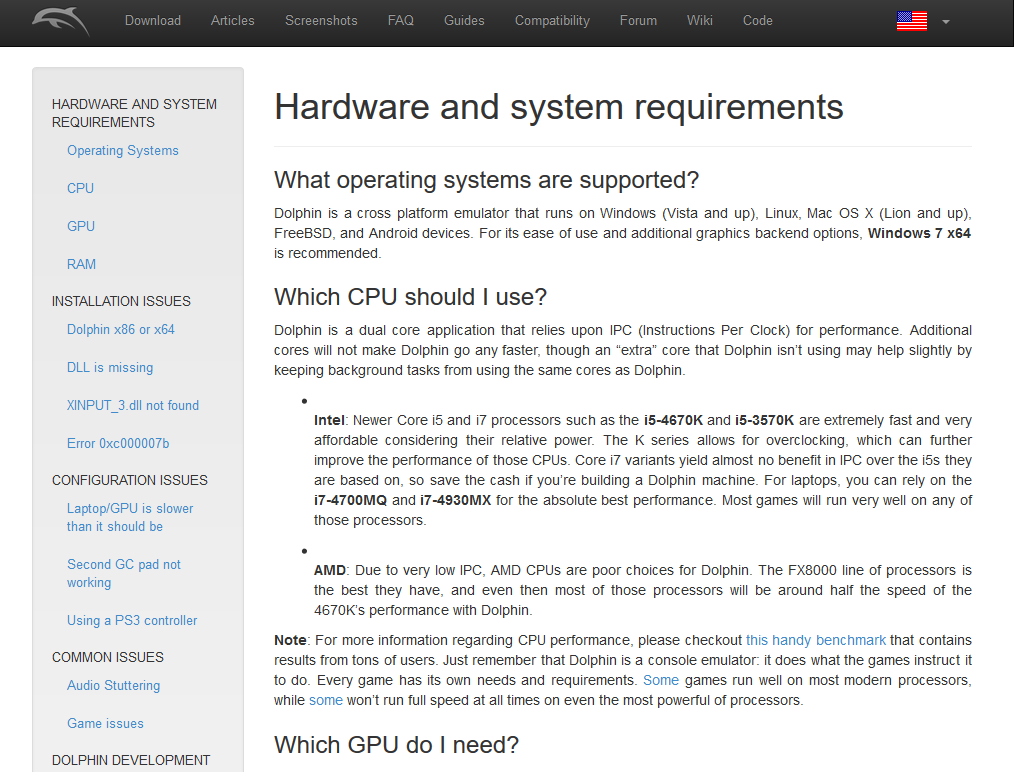
Please keep the System requirements for the Dolphin Emulator in mind. - http://archive.fo/t7bBR
I myself have a regular office notebook, so I cant really use it. This things eats a lot of resources, even on minimum requiresments. A gaming computer is recommended for high end Emulation. Downloading a GC/Wii Rom from a site takes about 30 minutes to 90 minutes, depending on the game. Also please be aware that there a lot more work and complexity invovled with this system (which are still being worked on), so with playing these you are bound to encounter flaws.
File (): B68E464919ECCF5234D13DC5E7C8FD21-757797.png (740.0 KB, 730x788, 1183__bowsette_and_princess_king_boo_luigi_s_mansion_mario_series__drawn_by_hago__dccefffdadddf.png)

File (): 5A04D11E5D495832B706C44343800F97-1091116.png (1.0 MB, 1242x766, Launchbox Next Screenshot.png)
File (): 1541307184BC3225E0712114FA86F84B-33365.png (32.6 KB, 1204x502, Mega Folder.png)

File (): C717C2021AF625FD280B7C5EA8BE0C86-51288.png (50.1 KB, 762x694, Translated Games.png)
DOWNLOAD LINK
https://mega.nz/#F!ZuRigCwA!5d_K9lRKUXdeaDMog84MGg
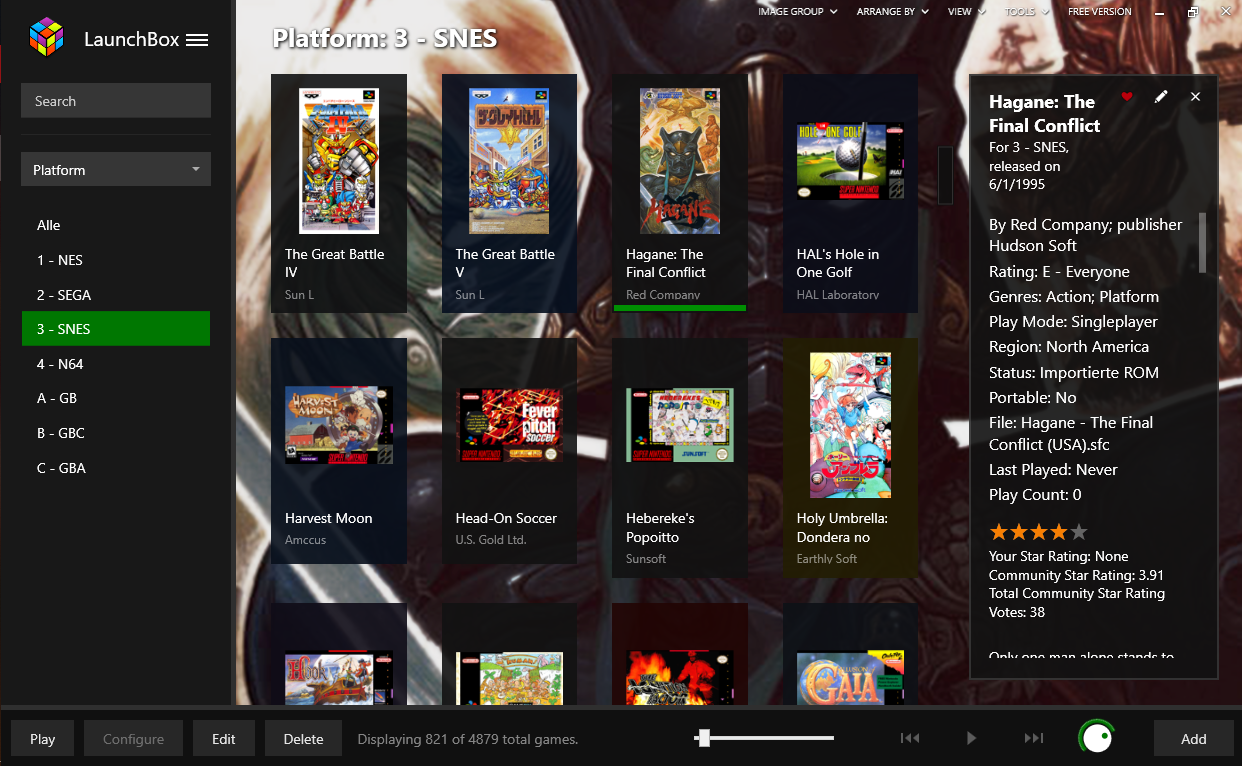
I took my sweet time for this Update after i was done upgrading my NES Mini, but I think It'll be worth it. This Load is a lot more refined than the last ones. Of course, the Super Nintendo is still the main emphasis, but i am sure you will appreciate the variety, especially if you were looking for some translated Japanese titles.
Removed all previous files and replaced them with Players Choice Titles recommended by SNES Drunk, the Launchbox Community Ratings and the Romhacking Net Database. Excluding the Japanese Translation and Romhacks every Title has a Community Rating of AT LEAST 3/5 Stars, often better.
CONSOLES
~ 270 SNES Titles PLUS ~ 60 Translated Japanese Games + a dozen full game Romhacks
~ 120 NES Titles
~ 60 Nintendo 64 Titles
~ 330 SEGA Mega Drive Titles
HANDHELDS
~ 100 Game Boy Titles
~ 70 Game Boy Color Titles
~ 170 Game Boy Advance Titles
ALSO includes
Updated Software for
- the Launchbox NEXT Hub
- the recent SNES Mini Classic Tool
- 6 different kinds of Romhacking Software
- a free Zipping Tool
TOTAL Size
2,3 GB worth over 1.000 handpicked games on 7 Systems
As some of you will know, Emuparadise got sued by Nintendo for 12 Million Dollars, Downloads are no longer available as of this year.
Unfortunately, The Nintendo Switch and shakey Online service still struggle to properly curate the vast majority of the titles included and beyond here. For all your recent Emulator needs i recommend Vimms Vault and Romhustler for further usage. Vimm recently finished their PS1 Library and is now erecting a Sega Dreamcast Database.
Also I am Currently contemplating on modifying a 3DS Game Boy and a Sega Flackback (aka the Mega Drive Classic). I dont think I will write a guide on those, but I may or not may Do some short posts about them If i tackle those.
Hope You will enjoy the contents of this one. c:
File (): 8B7429D26C86191B29CE26BBD3B6B550-1463616.jpg (1.4 MB, 1320x2090, flat_summer_by_novcel_dbgi32o.jpg)

Considering that the main product in his line is some Android based Rasberry Pie Ripoff from China that he resells for 200% the profit after he slapped his initials on them, I*d like to think it surpasses him by a considerable margin.
File (): 5C66E5BCA7D96AC04056FA8CA3C64A05-53234.png (52.0 KB, 200x199, teddiz.png)
File (): 5DF05F246CCB1E7CEF2D9AEAEABF11B8-258266.png (252.2 KB, 615x1442, ClipboardImage.png)
File (): 125BA1EF4FDC3C443E6919FAB062F13D-1455894.jpg (1.4 MB, 1530x1370, Conker_s Pocket Tales-01.jpg)

>>88066
>>88483
>>88521
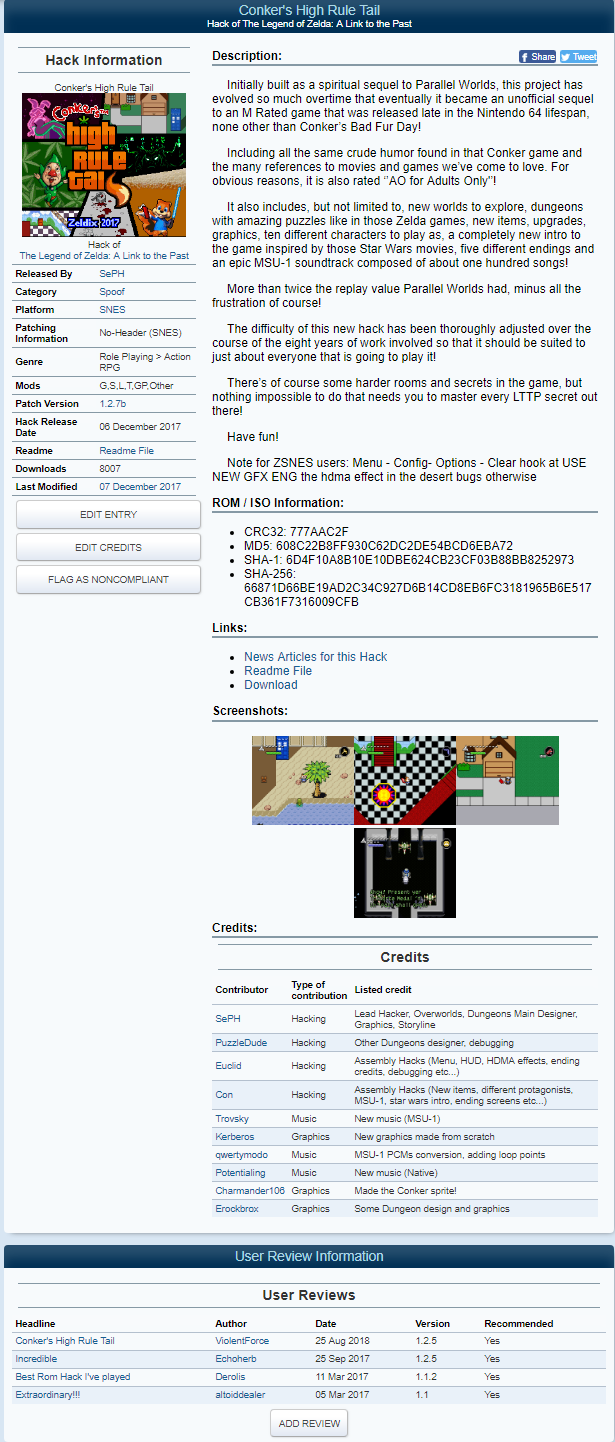
There is in fact a conker game within the library, in the section for SNES hacks
https://www.romhacking.net/hacks/3346/
a highly rated romhack of Link to the Past with an Original storyline including the Squirrel.
If you were looking for the N64 game, You can find a download link here:
https://vimm.net/vault/?p=details&id=2566
I omitted this title on purpose. In my eyes its an overrated game and does not have much going for it outside of the prophanity and the gore. Theres better alternatives available, especially on the same platform (which I included in the collection). The Teddiz were nice, tho. Still, I find it regrettable the developer went down this road instead of creating a more traditional action adventure.
>>88083
Some months ago heard of this Software, but never used it yet. I might include a copy of it in the future once i know how it works, but since i dont really play the same game back to back several times, I've not felt a need for such a tool yet. Maybe in the future.
>>88483
>>88521
There is in fact a conker game within the library, in the section for SNES hacks
https://www.romhacking.net/hacks/3346/
a highly rated romhack of Link to the Past with an Original storyline including the Squirrel.
If you were looking for the N64 game, You can find a download link here:
https://vimm.net/vault/?p=details&id=2566
I omitted this title on purpose. In my eyes its an overrated game and does not have much going for it outside of the prophanity and the gore. Theres better alternatives available, especially on the same platform (which I included in the collection). The Teddiz were nice, tho. Still, I find it regrettable the developer went down this road instead of creating a more traditional action adventure.
>>88083
Some months ago heard of this Software, but never used it yet. I might include a copy of it in the future once i know how it works, but since i dont really play the same game back to back several times, I've not felt a need for such a tool yet. Maybe in the future.